Category: AI Educational

  • How to Create Video with AI Using FlexClip (Best AI Tools Compared)

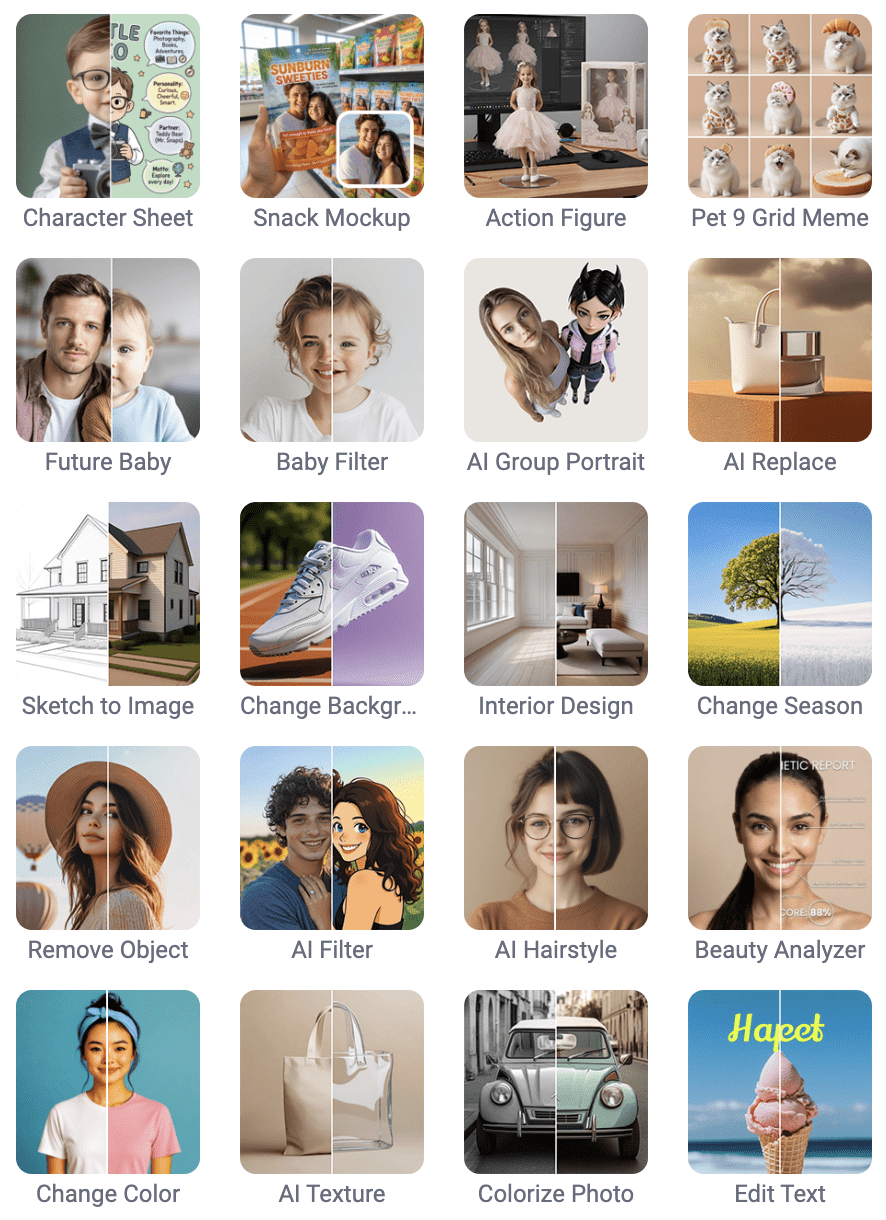
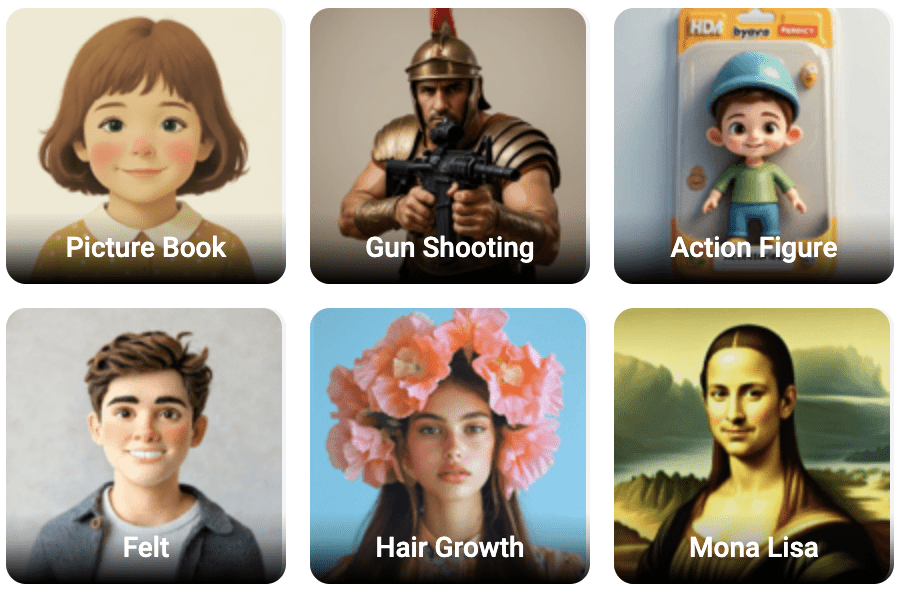
    Images above are from FlexClip’s animation library. Tap to expand on smaller devices.

    I Came for the AI… But That’s Not Why I Stayed

    I went into FlexClip planning to test its AI features, expecting the usual trade-offs you see right now—slower queues, inconsistent outputs, and credits adding up quickly. Some of that did show up. A few models didn’t work at all, some produced results that didn’t justify the cost, and others showed promise but lacked the level of control needed for a more reliable workflow.

    What caught me off guard was this: I kept coming back to it. Not for the AI features alone, but for how everything works together. Once I shifted my mindset and treated it as a video creation platform that happens to include AI tools, it became much more useful. This isn’t about prompts or theory. It’s based on hands-on use, what held up, what fell short, and what I’d actually keep using going forward.

    A Quick Update After Publishing

    After publishing this, I went back in to test a few more things, and this is where it got interesting. I tried FlexClip’s Google Nano Banana model almost as an afterthought, not expecting much, but the results COMPLETELY caught me off guard. The prompt understanding, consistency, and overall output quality were significantly better than I expected, especially compared to some of the other tools I had already tested.

    At just 4 credits per generation, it’s one of the most cost-efficient tools inside FlexClip, and it’s intuitive enough that it actually changed how I approach my workflow. Instead of relying as heavily on external tools for image generation, I can see myself using Nano Banana more directly inside FlexClip for certain projects. It also made me realize I probably need to spend more time exploring the other models as well. If something this good was easy to overlook, there’s a good chance there are other tools I haven’t fully tested yet that could shift how the platform fits into a real workflow.

    What This Guide Covers

    If you’re trying to create video with AI, the biggest problem isn’t lack of tools — it’s knowing which ones are actually worth using.

    In this guide, I’ll break down:

    • A simple FlexClip pricing overview (what you actually get)
    • AI video model comparisons, including Kling, Hailuo, VideoExpress, and FlexClip’s built-in generator
    • CapCut and Canva as editing and design alternatives
    • Which AI models inside FlexClip actually perform well
    • Where AI credits are being used (and wasted)
    • Which AI tools are worth using vs skipping
    • How to avoid burning through credits
    • Where FlexClip fits into a real AI video creation workflow

    Full Disclosure:

    Parts of this blog post were written with the help of AI, but it was also refined with my own experience, personal voice, and hands-on testing. I also checked the content for plagiarism to make sure the explanations and structure were fully my own.

    I was given access to FlexClip’s Business plan for free to test and review the platform. Since I enjoy working with tools that help create video with AI, I was genuinely excited to explore how it fit into my workflow.

    What FlexClip Actually Is

    FlexClip isn’t an AI-first platform. It’s a video creation tool with AI features layered in, and the interface reflects that by feeling like a mix of Canva’s layout simplicity and CapCut’s timeline-based editing structure. Overall, it’s intuitive and easy to work with, especially if you’ve used either of those tools before.

    The only real downside I ran into was the lack of precision design tools. While FlexClip does include basic snapping, it doesn’t offer layout measurements or spacing indicators, which can make alignment feel a bit loose. That stood out to me in particular because I come from a design background, where those small details matter when you’re trying to keep everything clean and consistent.

    I also ran into an issue when switching from 16:9 to 9:16. The undo history didn’t go back far enough, and I ended up losing a project because it stayed locked in the new format instead of reverting. To fix it, I would have had to recreate the project from scratch. It’s definitely worth saving and duplicating your project before making any major format changes.

    👉 Try FlexClip
    https://www.fantasyfusionai.com/go/flexclip

    Affiliate Link Disclosure:

    This article includes affiliate links. When you make a purchase using one of those links, I may earn a small commission. There’s no extra cost to you, and I only recommend software I actively use and trust.

    Full disclosure page:
    https://www.fantasyfusionai.com/affiliate-link-disclosure/

    If you’re considering FlexClip, here’s a simple breakdown of what you actually get with each plan so you can decide if it’s worth it for your workflow to create video with AI on this platform.

    FlexClip Pricing Breakdown (Simple Version)

    Free Plan — $0/month

    FeatureWhat It Means
    720p exportsBasic quality
    Limited AI creditsTest features only
    WatermarkNot ideal for polished or professional work
    Short videosMax ~10 minutes

    Plus Plan — $11.99/month

    FeatureWhat It Means
    1080p exportsGood for most content
    3,600 AI credits/yearRegular usage
    No watermarkClean output
    Unlimited video lengthMore flexibility
    Premium assetsBetter visuals

    Business Plan — $19.99/month (what I tested)

    FeatureWhat It Means
    4K exportsHigh-quality output
    9,600 AI credits/yearEnough for regular use, but you can burn through it quickly if you’re experimenting heavily
    Unlimited stock mediaNo asset limits
    Brand kit + fontsConsistent branding
    Large storage (cloud + hosting)Scales with bigger projects

    What Actually Matters Most

    When choosing a FlexClip plan, only a few things really make a difference:

    • Export quality (720p vs 1080p vs 4K)
    • Watermark removal
    • AI credit limits
    • Access to premium templates and assets

    Everything else is helpful, but these are the features that will directly impact your final result.

    The Part Most People Overlook: Credits

    FlexClip’s AI tools run on a credit system, and on paper the Business plan looks generous at 9,600 credits per year, or 800 per month. That can go a long way, but how far those credits actually stretch depends on how you use the platform. If you’re mainly trying to create video with AI, they can disappear much faster than expected. If you’re using AI more selectively alongside FlexClip’s animated templates and editing with their AI tools, they tend to go much further.

    AI Video and Editing Tool Comparison (Pricing + Features Breakdown)

    These tools aren’t all direct competitors — they serve different roles depending on whether you’re focused on wanting to create video with AI, editing, or use the other AI tools along side the animation templates. Most tools here specialize in one part of the workflow. FlexClip is one of the few that brings everything together.

    Pricing and Credit Comparison

    ToolMonthly Cost (USD)Monthly Cost (CAD)AI Credits
    1a. Kling AI (Standard)$6.99 USD~$9.50 CAD660/month (7,920/year)
    1b. Hailuo/Minimax AI (Standard)$9.99 USD~$13.50 CAD1,000/month (12,000/year)
    2. VideoExpress AI$179 one-time~$240 CAD (lifetime)Unlimited
    3. FlexClip (Business)$19.99 USD~$27 CAD800/month (9,600/year)
    4. Canva (Pro)~$13 USD$18 CADLimited AI (not tested for this review)
    5. CapCut (Pro)$19.99 USD$27.99 CADLimited AI (not tested for this review)

    Creation and Editing Features

    ToolEditorTemplatesTransitions & EffectsDesign Tools
    1a. Kling AI (Standard)NoNoNoNo
    1b. Hailuo/Minimax AI (Standard)NoNoNoNo
    2. VideoExpress AIBasicNoNoNo
    3. FlexClip (Business)YesYesYesMotion only
    4. Canva (Pro)YesYesBasicDesign and Motion
    5. CapCut (Pro)StrongNoStrongNo

    Best Use Case Comparison

    ToolBest forBiggest Limitation
    1a. Kling AI (Standard)High-quality AI animationNo editor or structure
    1b. Hailuo/Minimax AI (Standard)Subtle, lower-cost animationWeaker transitions, can be unpredictable
    2. VideoExpress AISimple AI animation with unlimited useVery limited editing and still unpredictable
    3. FlexClip (Business)All-in-one video creationNo spacing indicators; duplicate projects when switching formats to avoid layout or save issues.
    4. Canva (Pro)Design, layouts, branding, light videoNot as many templates for animation
    5. CapCut (Pro)Advanced editing and effectsBetter for short-form video, more manual

    The Simple Reality

    FlexClip is best thought of as an all-in-one video creation platform that lets you create video with AI, rather than an AI-first generation tool. It brings everything into one place, with the experience centred around animation, editing, and overall structure, while the AI features support the workflow instead of leading it. They’re designed to enhance the process rather than replace it entirely, which is why I prefer bringing in assets from other tools as part of my workflow.

    The Business plan was worth it for the added flexibility and fewer limitations, but it’s not something I rely on for everything. I still use external tools like ChatGPT and VideoExpress for image generation, then bring those assets into FlexClip for animation, editing, and overall structure. That’s partly because AI image generation can be unpredictable, and even at 0.5 to 10 credits per image depending on the model, the cost can add up quickly if you’re doing a lot of testing and iterations. It also includes smaller AI tools like background remover, image-to-illustration, image extender, outfit changer, and hairstyle changer, which are useful but not the main focus.

    Where those AI tools do shine is when you want to get more creative with your slideshows. Features like AI Image to Image can turn visuals into line art or watercolor styles, which can add a unique look without much extra effort. Combined with some of FlexClip’s transitions and effects, it’s an easy way to create more stylized, visually interesting scenes without needing advanced design work.

    What This Actually Means (Real Breakdown)

    1. Kling vs Hailuo (Why They Came Out on Top for Me)

    Kling and Hailuo ended up being my top performers to create video with AI — not just because of quality or pricing, but because they both support start and end frames. That feature alone makes a huge difference. Further down in the AI Tools section, I’ll show video examples of a mermaid to compare how these models perform and explain why they stood out as the most reliable options in my workflow.

    With start/end frames:

    • you control the beginning of the scene
    • you control the end of the scene
    • the AI fills in the motion between

    Without it:

    • motion becomes unpredictable
    • transitions can feel random
    • scenes don’t always connect properly

    This is exactly why Kling AI stood out.

    1a) Kling AI:

    • smoother motion
    • cleaner transitions
    • more cinematic output

    1b) Hailuo AI:

    • more credits
    • lower cost per generation
    • works well for simpler animations

    Another newer feature worth mentioning is Motion Control, which lets you take a still image and guide its movement using the motion of a reference video. That opens up a lot of creative potential, especially for more directed animation. For the kind of animation I’m focused on right now, I haven’t explored that enough yet to comment on it in depth, so I didn’t want to overstate it here.

    There are also newer models out there, like Higgsfield, that many people consider even stronger in some cases. But for the purpose of this review, I could only compare what was actually available inside FlexClip at the time. I didn’t want to turn this into a comparison of tools FlexClip doesn’t currently offer.

    Why I Didn’t Test Sora

    Sora is being phased out, so it didn’t make sense to include it in a long-term workflow.

    2. VideoExpress (Unlimited Basic Animations)

    VideoExpress does include an editor, but it’s fairly minimal. You can make quick adjustments, but it doesn’t offer the kind of full workflow you’d expect from a more complete editing platform. You’re not getting strong transitions, polished effects, or much in the way of a built-in music workflow. Where it does make sense is for simple animation. It works well for subtle motion, quick outputs, and lightweight scenes where you don’t need a lot of control, making it somewhat comparable to Hailuo when you’re looking to create video with AI software.

    The biggest advantage is that once you pay for the software, you’re not dealing with a credit system, which makes it much easier to experiment freely without worrying about usage limits. The tradeoff is control. VideoExpress doesn’t support start and end frames, so it’s less directed than tools like Kling or Hailuo. It can still handle simple scenes and low-motion animation, but if you need cleaner transitions, more predictability, or stronger character consistency, it starts to feel limited. That said, the unlimited generation model is a major advantage, and for the right kind of workflow, it can easily outweigh those drawbacks.

    👉 Try VideoExpress AI
    https://www.fantasyfusionai.com/go/videoexpress

    3. FlexClip (The “All-in-One” Option)

    FlexClip isn’t trying to be an AI-first generator. It leans into being a complete video creation tool, with AI features layered in to support the process rather than drive it entirely. That distinction matters, because it sets the expectation for how the platform is meant to be used. What it really brings together is animation, editing, templates, and overall structure, helping you assemble and refine content instead of generating everything from scratch. Because of that, it works best when you treat it as part of a full workflow rather than expecting it to handle everything on its own.

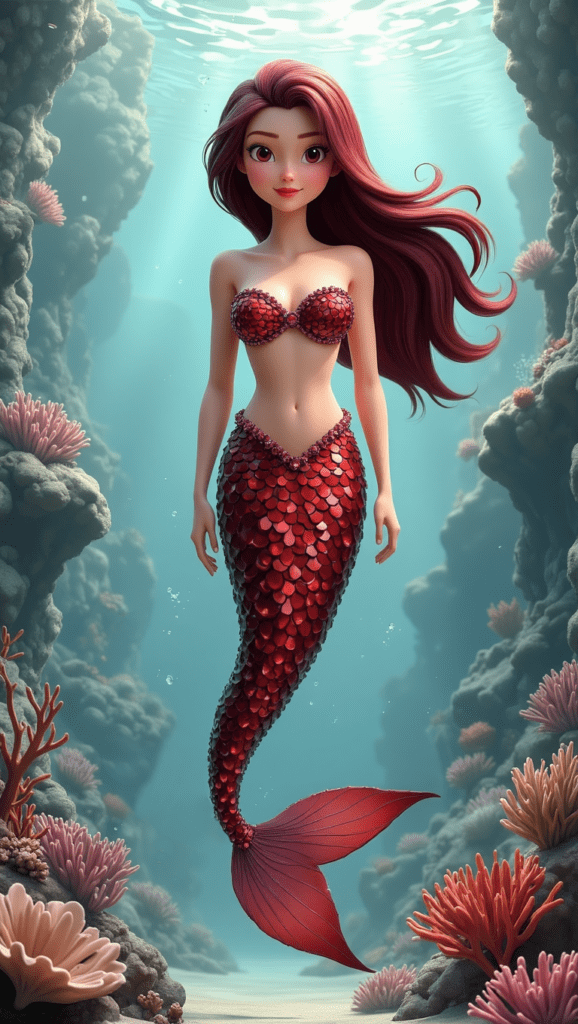
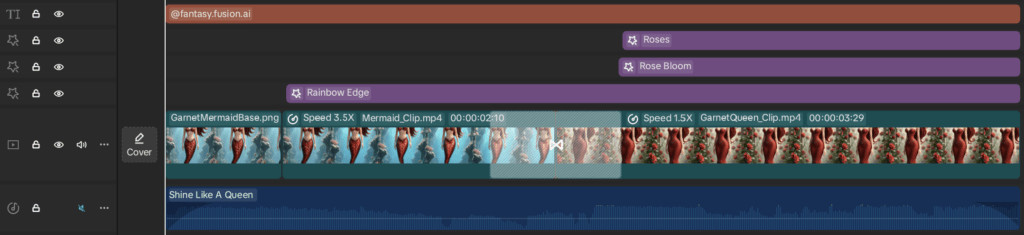
    I did test FlexClip’s generative animation options (20 credits per generation – see diagram further below in AI Tools), and the results were mixed. A more complex mermaid-style clip (shown below, with versions successfully generated in Kling and Hailou) struggled inside FlexClip, taking a long time to queue before ultimately failing and refunding the credits. That’s not entirely surprising given how demanding that type of animation is, so I tried again with a simpler setup. Using my own images with defined start and end frames worked much better, producing a smoother transition that actually felt worth the ~20 credits per use.

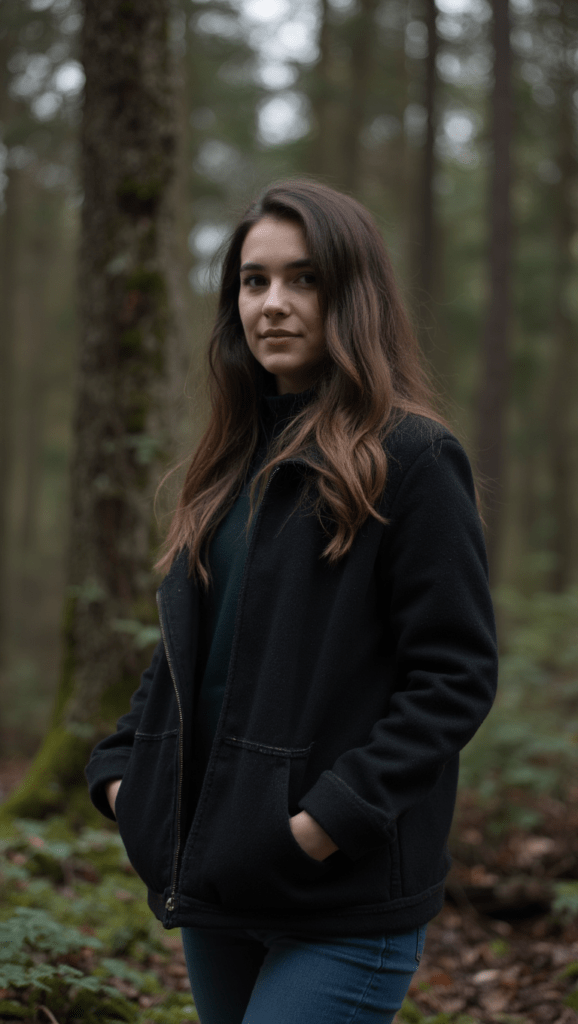
    Start Frame Image (Video Express)

    Video rendered with FlexClip

    End Frame Consistent Character (Video Express)

    So while FlexClip absolutely can work to create video with AI, I’d look at it as a useful built-in option rather than the main reason to subscribe. The real value is still the larger workflow around it.

    👉 Try FlexClip
    https://www.fantasyfusionai.com/go/flexclip

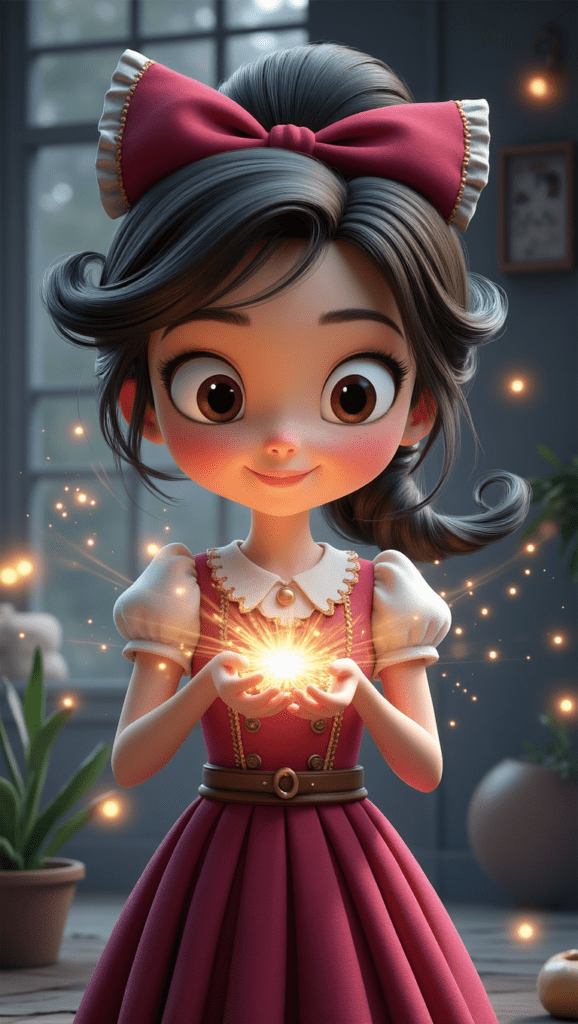
    I also tried two prompt-based animations (image from VideoExpress) without an end frame, and the results were… memorable. The animations were funny in a very AI way. My guess is that the prompt needed more precision, but that also proves the point: for beginners experimenting with AI animation, that kind of unpredictability can get expensive fast.

    Notice the extra finger?

    Prompt:

    Animate the Pixar-style young woman as if she is discovering a magical idea. She lifts one hand and creates a small swirling ball of warm glowing magic above her fingers, with soft sparkling particles drifting outward. Her expression brightens with excitement, her body shifts naturally, and her hair moves gently with the motion. Keep the same cozy studio background, same warm desk lamp lighting, same full-body framing, and same outfit. Motion should feel lively, charming, and polished. No camera movement, no background changes, no outfit changes, no dramatic relighting.

    Sorry.. what? So funny.

    Prompt:

    Animate the Pixar-style young woman as if she is getting ready to head out the door. She grabs a jacket and purse in one smooth motion, turning slightly and taking a step as if leaving the room. Keep her movement lively and natural, with gentle hair sway, soft blinking, and a bright motivated expression. Change the background to a warm cozy entryway near the front door, with a coat rack, small table, and soft indoor lighting. Change her outfit to a casual polished look: fitted long-sleeve top, stylish jacket, slim pants or leggings, and ankle boots, while keeping the same character face, proportions, and Pixar-style design. Motion should feel smooth, active, and believable.

    4. Canva (Still One of the Easiest Design Tools to Use)

    Canva does include AI features, but that’s not the focus here. In this comparison, it makes more sense to look at it as a design and layout tool rather than an AI animation platform. Where Canva stands out is in branding, visual consistency, and ease of use. It’s one of the simplest platforms for creating polished graphics, clean layouts, and professional-looking branded content with minimal friction.

    That said, it works differently than FlexClip. Canva is more design-focused than motion-focused, with fewer animation-driven templates, especially for slideshow-style content. Its animation tools are more limited, and it’s not really built around AI video workflows in the same way. So while Canva is a strong choice for visuals and branding, FlexClip makes more sense when the goal is creating more structured, animation-driven video content.

    5. CapCut (Still One of the Strongest Editors Available)

    CapCut does include AI features, but that’s not really the focus here either. In this comparison, it makes more sense to look at it as a video editor first, not an AI animation tool. Where it stands out is in the editing itself. It’s still one of the strongest options if you want control over your final video, especially with transitions, effects, masking, and more hands-on refinement.

    That said, it works differently than FlexClip. CapCut is more manual from start to finish and doesn’t offer the same kind of structured, template-driven workflow for quickly building videos. That’s great if you like full control, but it also makes it less efficient for fast, template-based content. So while I wouldn’t position CapCut as an all-in-one AI video workflow tool like FlexClip, it’s still an excellent choice if your priority is polishing, refining, and building with more control.

    👉 Try CapCut
    https://www.fantasyfusionai.com/go/capcut

    Simple Decision (This is What People Actually Want)

    If your goal is:

    • Best AI animation quality Kling AI
    • More credits, simpler animation Hailuo AI
    • Unlimited but basic animationVideoExpress AI
    • All-in-one animation workflow FlexClip
    • Advanced editing CapCut Pro
    • Design + branding with some animation Canva Pro

    How This Fits into a Real Workflow

    Here’s how this actually plays out in practice:

    • ChatGPT / VideoExpress / FlexClip (Google Nano Banana) → Image creation
    • VideoExpress/Hailou/Kling → Animation (depending on action involved)
    • FlexClip → Structure, templates, fast builds
    • CapCut Pro → Final polish (if needed)
    • Canva Pro → Professional thumbnails for social media

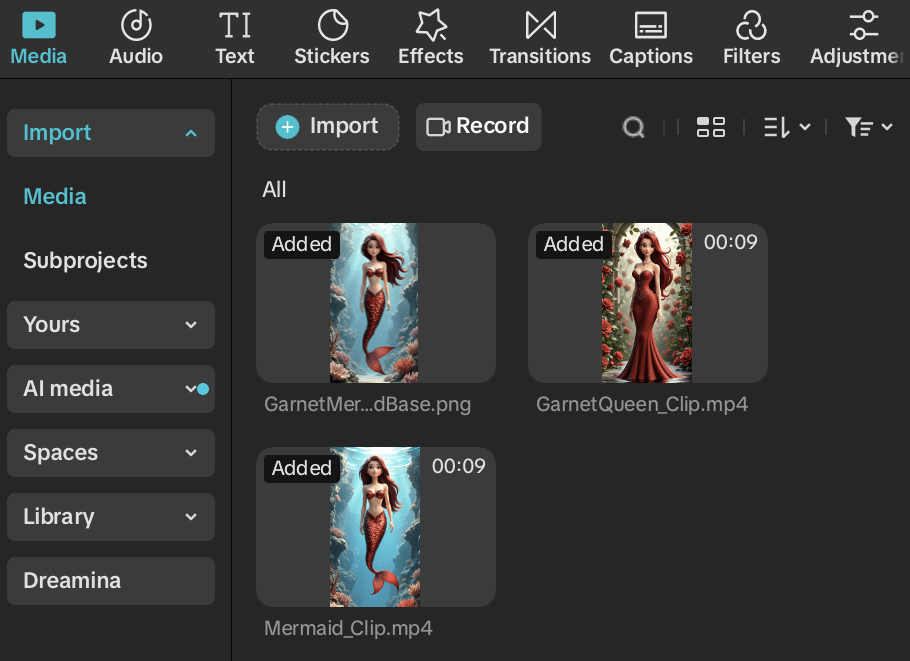
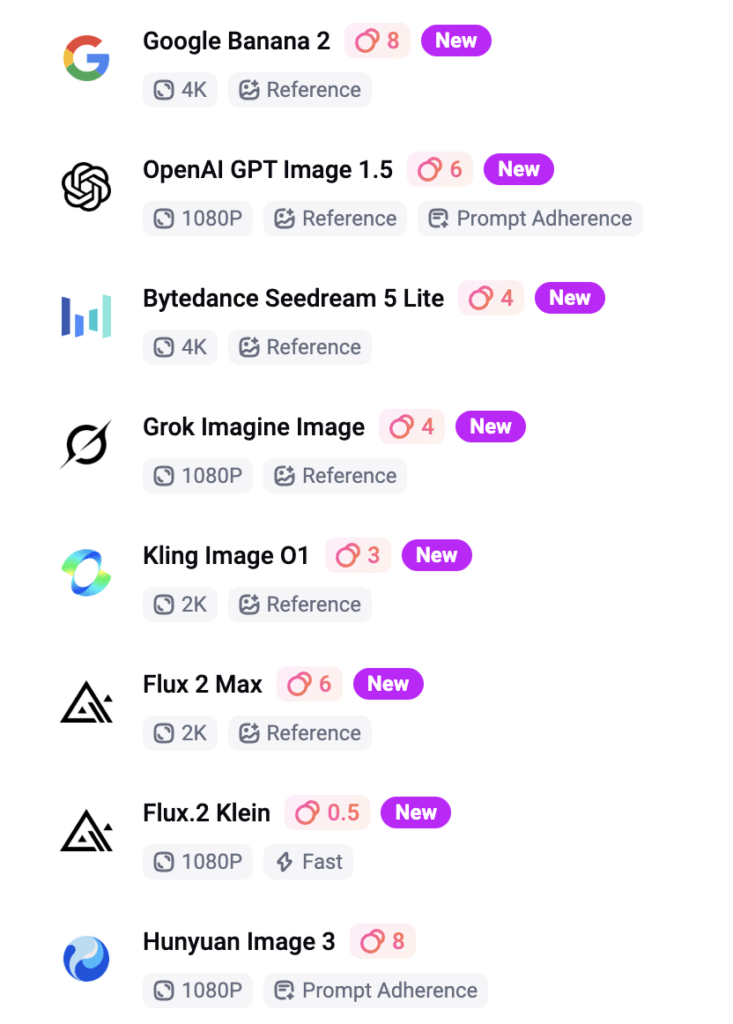
    AI Tools Inside FlexClip (With Cost Per Use)

    FlexClip includes a wide range of AI tools across video, image, and audio, all built directly into the platform. As shown above, everything is organized into clear categories, making it easy to explore depending on your workflow. What stood out to me was just how much is actually packed into one place. I’m still exploring a lot of these tools, especially on the audio side, which I haven’t had much time to test yet but plan to dive into more in the future. It’s one of those platforms where the more you click around, the more features you end up discovering.

    I tested a range of FlexClip’s AI image tools below, along with the credit cost shown for each one. Some tools aren’t pictured here, but this should give a good snapshot of how the feature set is priced in real use. From what I could see, anything over 2 credits seemed to fall into the more premium side of the AI tools, so my assumption is that you’d likely need to be on a paid plan to use those consistently. These tools are useful for quick fixes and creative experimentation, but they’re not something I’d treat as professional-grade editing replacements.

    A screenshot of the AI tools available within FlexClip is shown above.

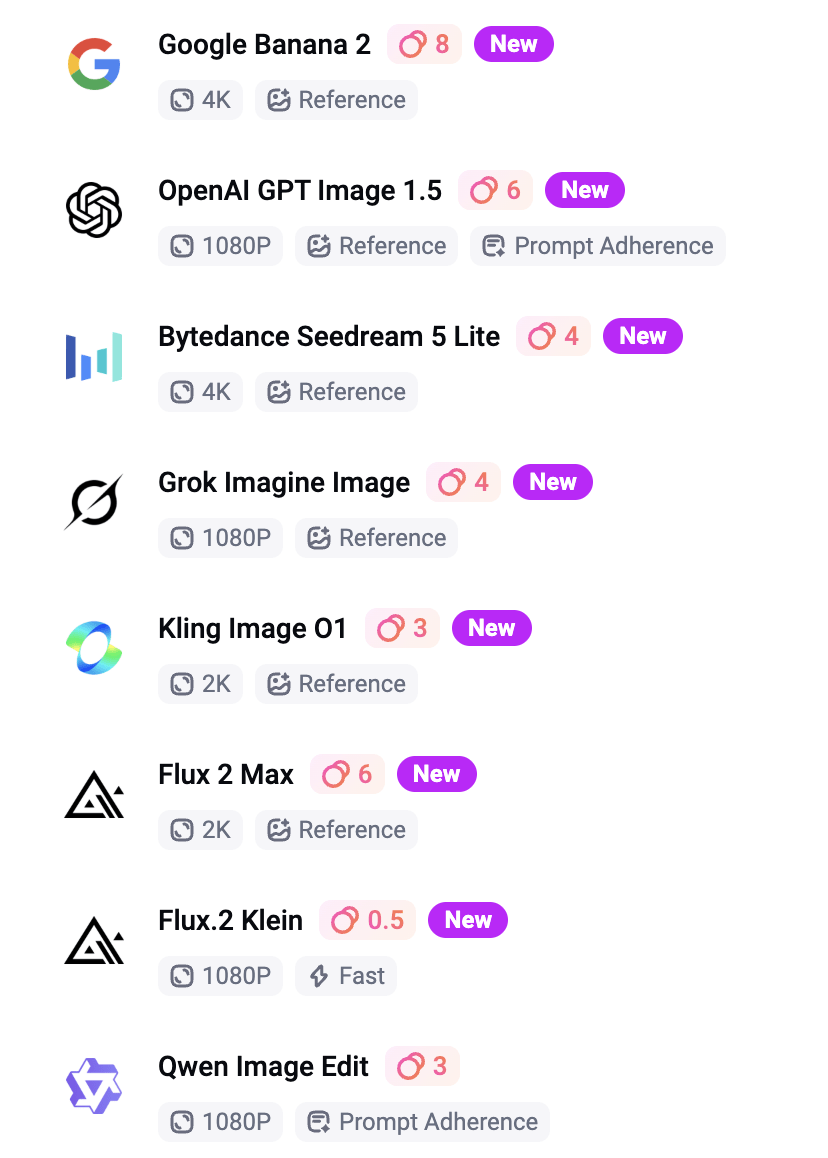
    Text-to-Image Models
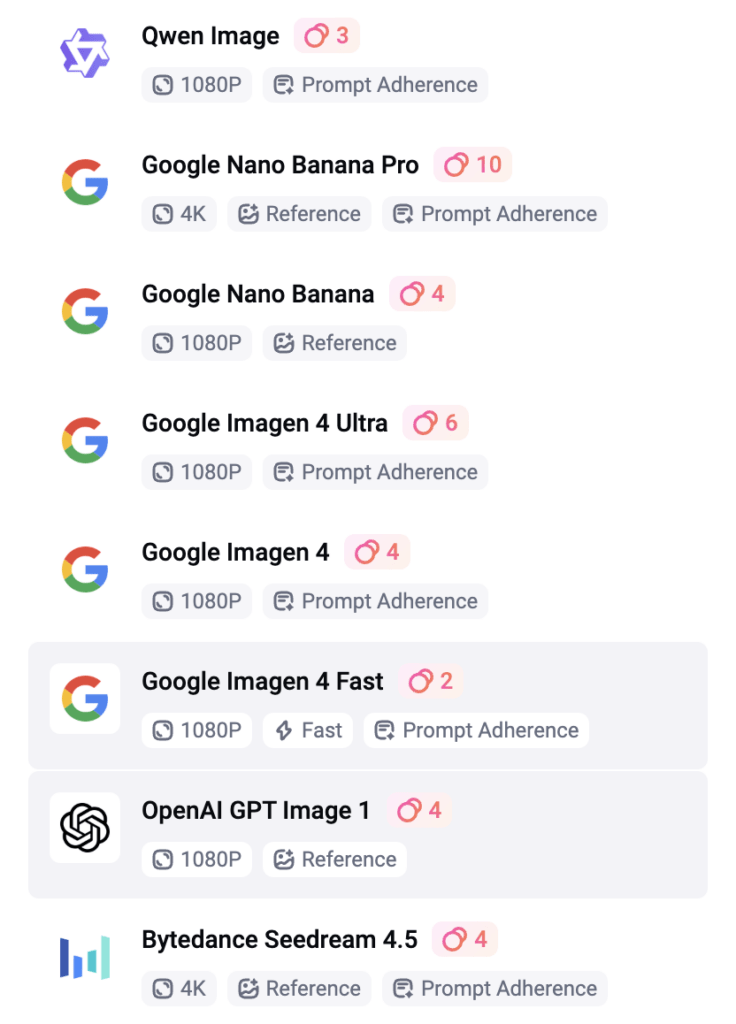
    AI Photo Editor

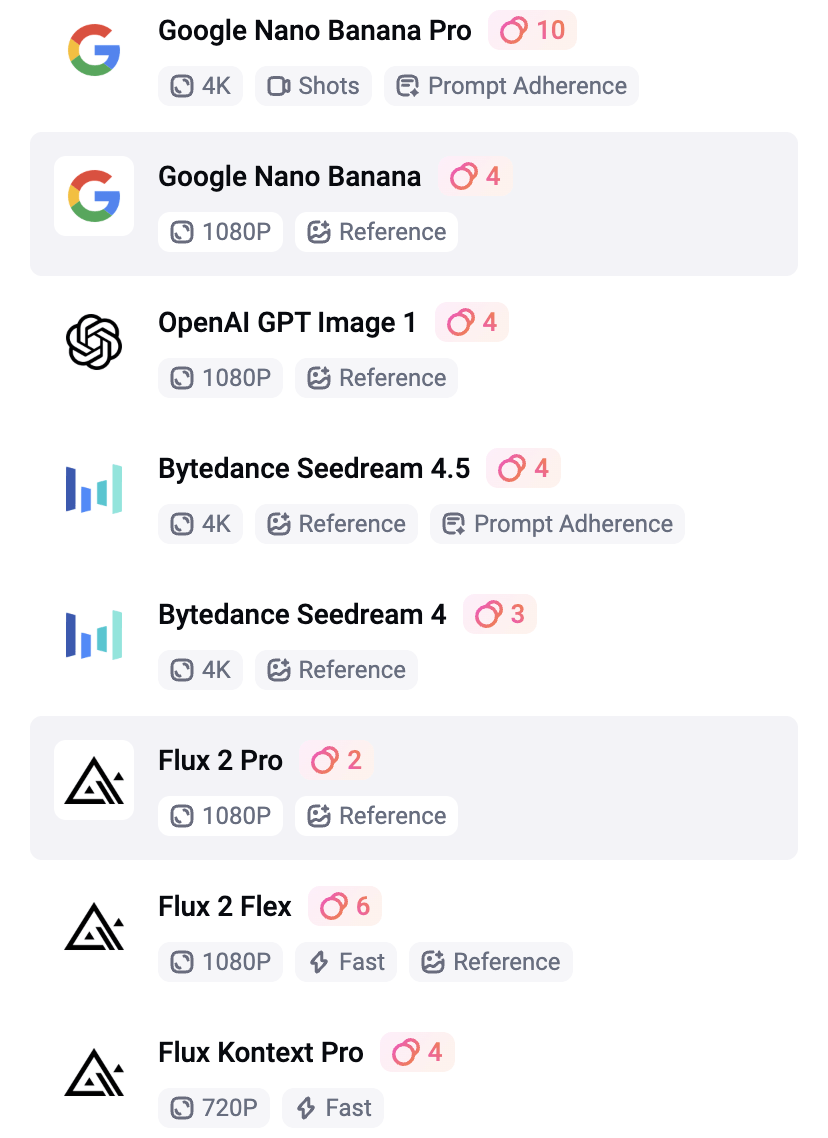
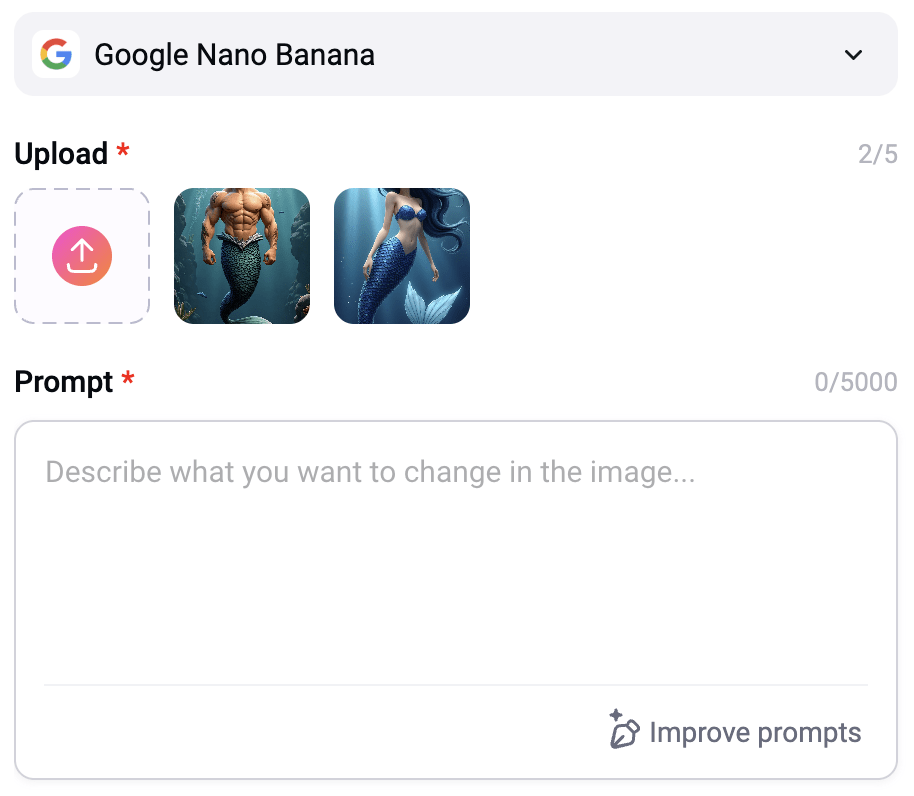
    The AI Photo Editor was probably the biggest surprise for me. As shown above, the available models are listed on the left, with a wide range of effects on the right, and the prompt interface below. What really stood out was how efficient and intuitive the Nano Banana model felt. At just 4 credits per use, it allows you to upload and combine two images, which led to some of the best character consistency I’ve seen so far. Honestly, the results from this model completely blew me away. It’s one of those tools that immediately feels useful, and at the same time, it’s clear there’s still a lot more to explore within this part of the platform.

    AI Image to Image, AI Restoration, AI Image Extender, AI Object Remover, AI Clothes Changer, and AI Hairstyle Changer

    Original Image (ChatGPT)

    Generated Scratched Image with ChatGPT (for RESTORATION)

    Ghibli 1 (2 CR/use)

    3D Cartoon 1 (4 CR/use)
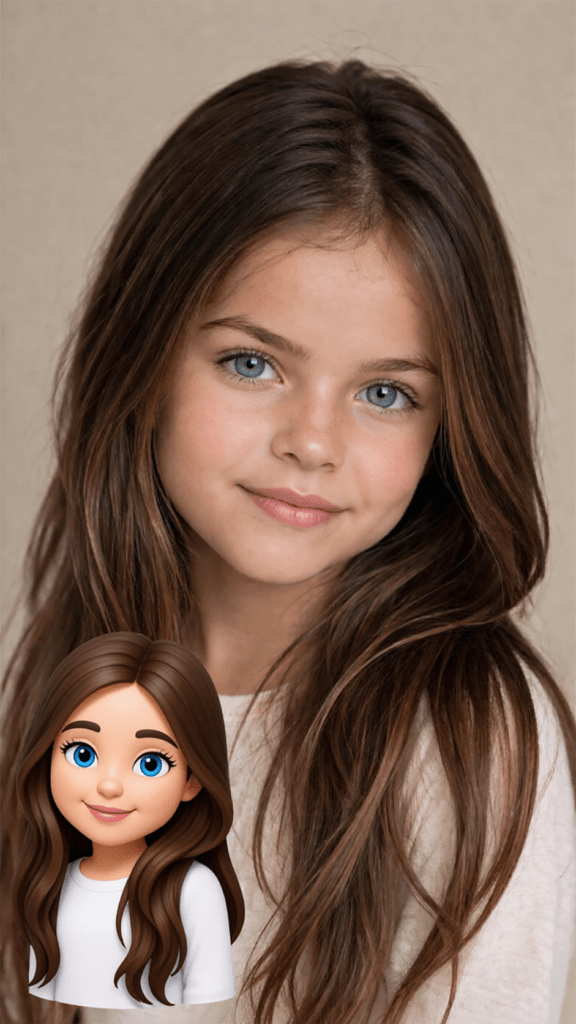
    3D Emoji (4 CR/use)

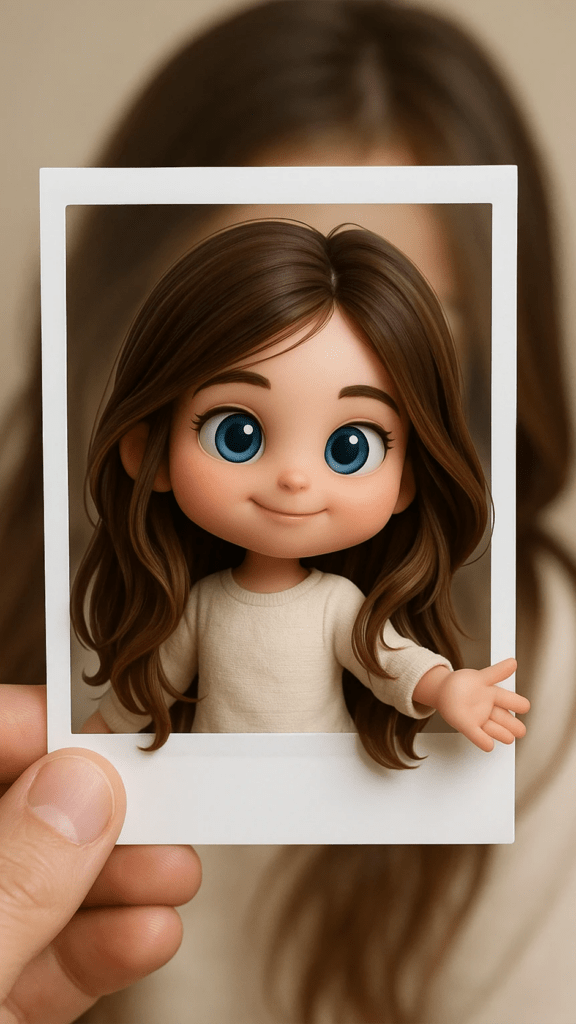
    3D Polaroid (4 CR/use)

    B&W Sketch (4 CR/use)

    Crayon (4 CR/use)

    Line Drawing (4 CR/use)

    Picture Book 1 (4 CR/use)

    Pixel Art (4 CR/use)

    Watercolor 1 (4 CR/use)

    Watercolor 2 (4 CR/use)

    Watercolor 3 (4 CR/use)

    RESTORATION – B&W (6 CR/use)

    RESTORATION – Natural (6 CR/use)

    RESTORATION – Pop Art (6 CR/use)

    Image Extender (2 CR/use) Black strip?

    Same Girl with Background Added to Image

    Removing Book (5 CR/use) Results were smudged

    Outfit Change (16 CR/use)

    Hairstyle Change (4 CR/use)

    Image-to-Video Models

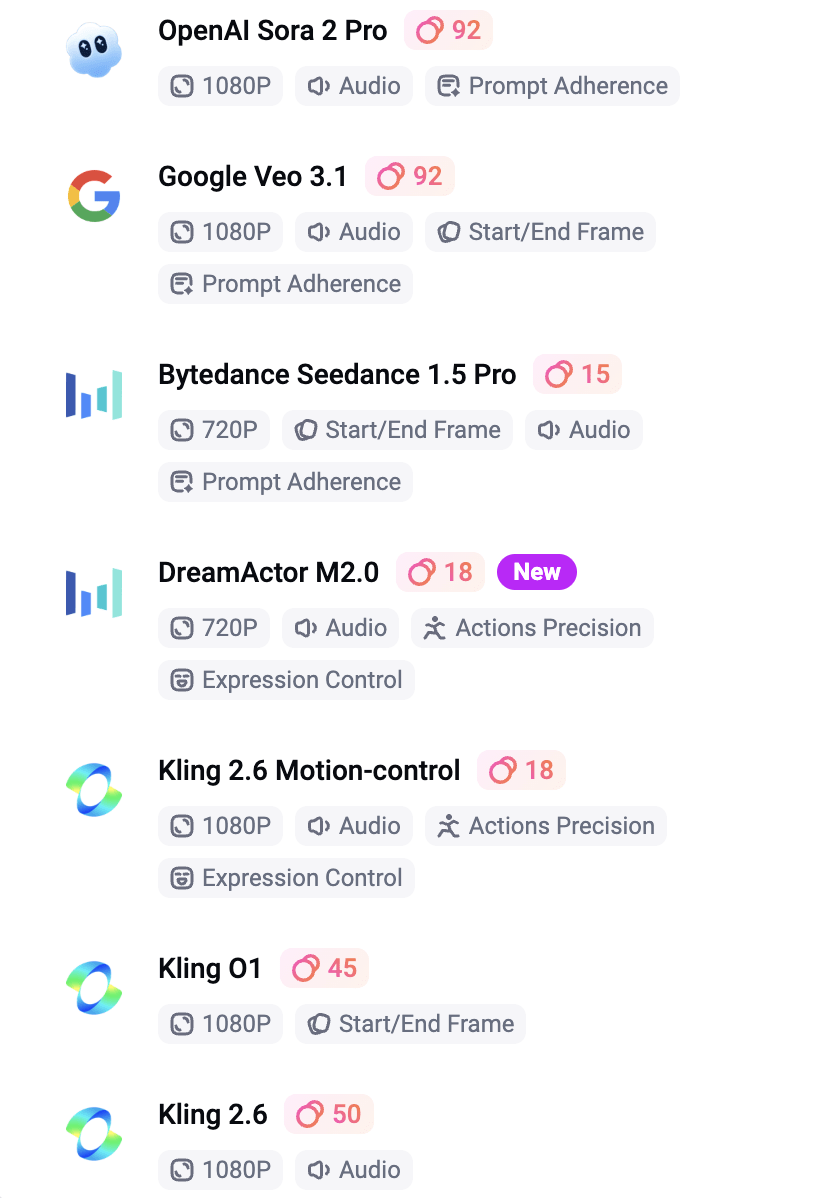
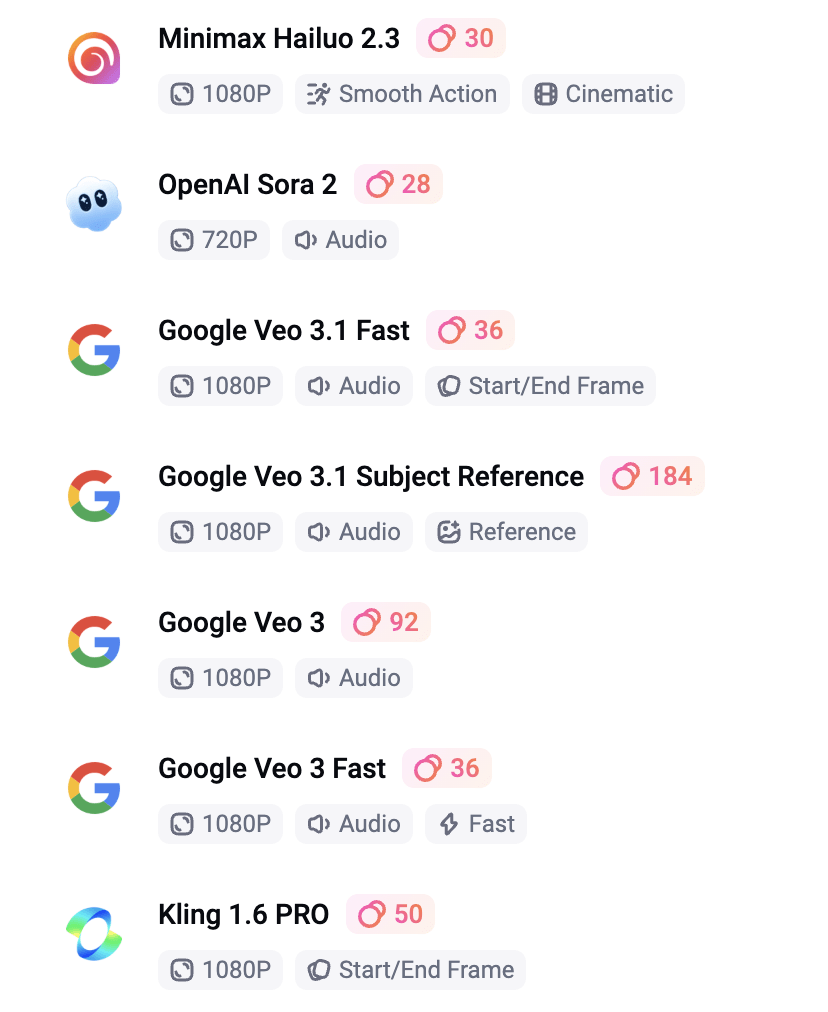
    How I Tested the Models

    I focused on models that:

    • support start/end frames
    • stay under ~50 credits per generation
    • consistently complete without errors

    Anything outside of that wasn’t practical for me for repeat use.

    Kling 2.1

    (Best Overall Cost & Performance)

    Kling 2.1 was the strongest model overall in my testing. It was 45 credits per generation, supports start and end frames, and produced the most stable results. The biggest difference wasn’t just the visual quality, but how it handled motion. Transitions felt smoother, movement felt more intentional, and the scenes flowed in a way that looked more directed and polished. It didn’t feel like the AI was guessing its way through the clip — it felt like it actually understood the assignment.

    Minimax Hailuo 02

    (Lower Cost & Simple Animation)

    Hailuo was the more affordable option at 30 credits per generation, and it also supports start and end frames. It worked reasonably well for simple animation and more subtle motion, so I can see why it would appeal to someone who wants more volume for less cost. That said, the output felt less refined than Kling. The transitions were more inconsistent, and you’d occasionally get awkward movement or slightly unnatural blending. For an extra 15 credits, I would go with Kling 2.1.

    Some models queued for a long time and ultimately errored out on the more complex mermaid animation, including Google Veo, Seedance, and FlexClip’s default generator. FlexClip did produce some results under simpler conditions, but overall the performance was mixed. With beginner-level prompting, that kind of inconsistency can get costly quickly, even with credits being refunded.

    That said, I haven’t done enough testing to confidently rule anything out yet, especially after discovering how strong some of the other tools can be. Now that I’ve had this breakthrough with Google Nano Banana, I’ll be going back to explore the other models more thoroughly and give them a fair shot before forming a final opinion.

    Why I Still Use Image Video to Create Video with AI (Even Without Focusing on Prompts)

    Starting with an image, even one created outside of FlexClip, tends to produce more consistent and usable results in my workflow. It gives me full control over composition, lighting, and subject detail before animation begins, which helps avoid the unpredictability that often comes with generating everything from scratch.

    It also makes the overall workflow more reliable, since you’re building on a solid visual foundation rather than relying entirely on AI interpretation. In practice, this means cleaner motion, fewer artifacts, and outputs that feel more intentional and polished, especially when using the image-to-video models shown above.

    Since originally writing this, I’ve started testing FlexClip’s Nano Banana model more seriously for image generation. In some cases, it’s actually reduced how often I need to rely on external tools. It’s fast, consistent, and at 4 credits per generation, it’s one of the few tools inside FlexClip that feels both practical and scalable for regular use.
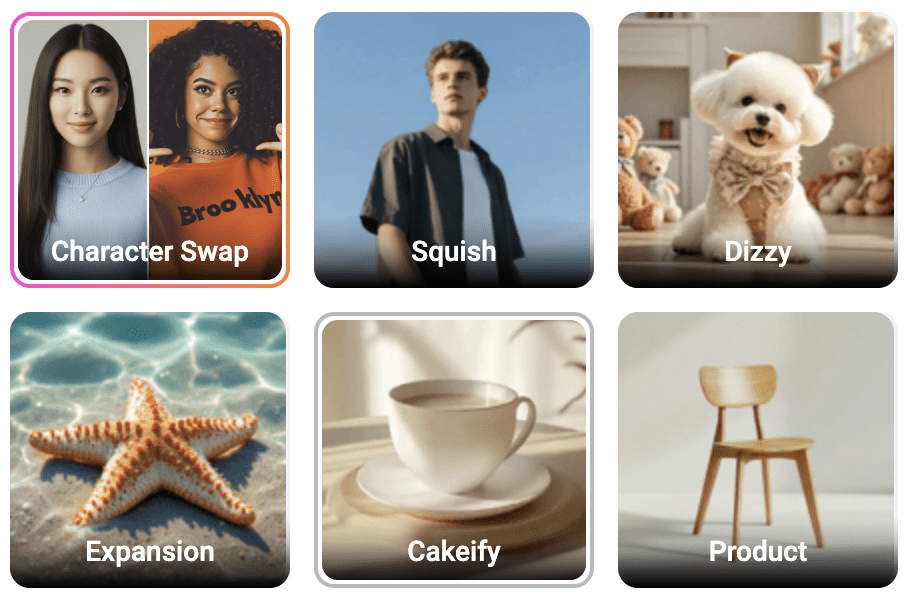
    AI Video Effects

    I also briefly tested some of the AI Video Effects, including the “Kiss” effect. The effects themselves look really cool and definitely have potential, but the results were inconsistent compared to a more controlled workflow. I actually had better results creating a single image with Nano Banana and then animating it in VideoExpress than I did trying to animate two separate images directly inside FlexClip with the Kiss effect. Because of that, I didn’t spend much time exploring those effects further for this review, but it’s something I’ll come back to test more as the models continue to improve.

    Below are screenshots of the many Video Effects offered within FlexClip:

    Understanding Where Credits Actually Matter

    One thing I noticed pretty quickly is that not everything in FlexClip uses credits. The AI generation and image-based tools do, but templates, editing, transitions, and most of the structure-building side of the platform feel much more open to use, which changes how I think FlexClip makes the most sense in a real workflow. Instead of forcing everything through its AI features, I think it works better to use those paid tools where they actually help, especially since smaller jobs like adjusting an image for a slideshow, extending it slightly for better framing, restoring an older image, or testing lighter creative tools. They are inexpensive enough that they don’t feel like a big risk.

    That also made some of the simpler tools more fun to experiment with than I expected, because you could try things without feeling like you were draining credits too fast. If you’re doing heavier AI animation work, though, it may still be smarter to subscribe directly to a dedicated tool like Kling AI and then use FlexClip for everything around it, including templates, transitions, editing, and overall structure. FlexClip also has AI audio tools, but for the purpose of this post I stayed focused mostly on the image and animation side of the workflow.

    How I Avoided Wasting Credits

    For this reveiew I didn’t generate images inside FlexClip. Instead, I used ChatGPT and VideoExpress first so I could refine the visuals before spending credits to create video with AI models. That gave me a lot more control upfront. I could fix the look I wanted first, avoid burning through repeated generations, and save FlexClip’s credits for the parts of the workflow where they actually mattered more. After experimenting with Nano Banana I will definitely be using that model more (at 4 CR/use).

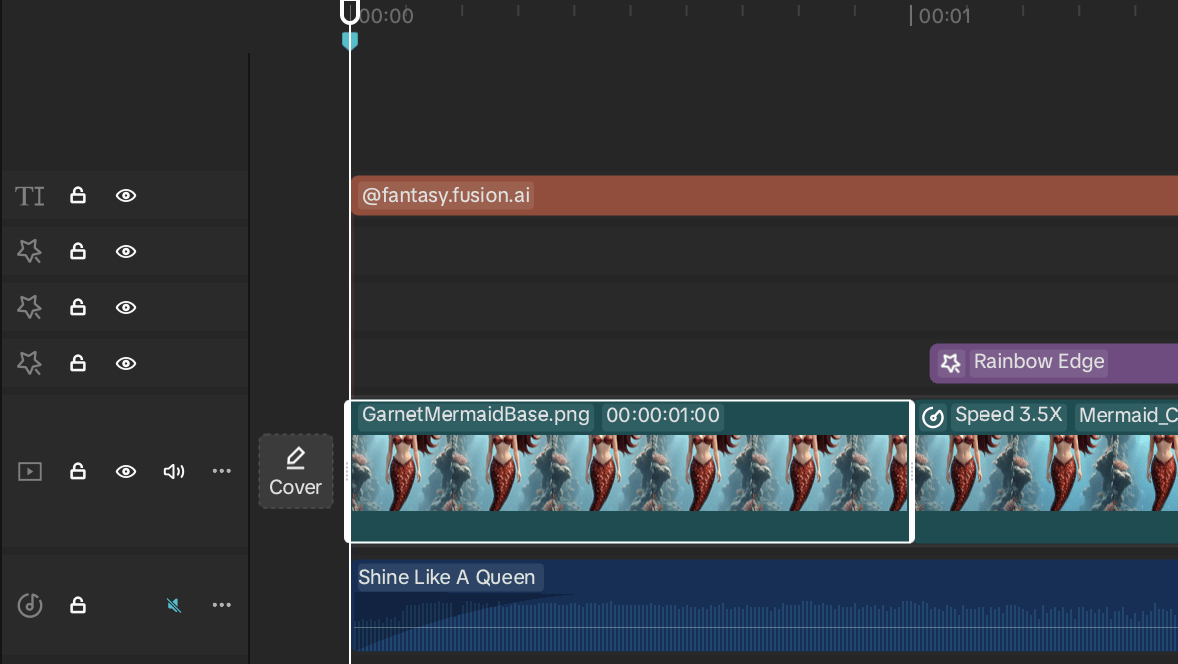
    Editor and Templates (The Real Value)

    This is where FlexClip surprised me.

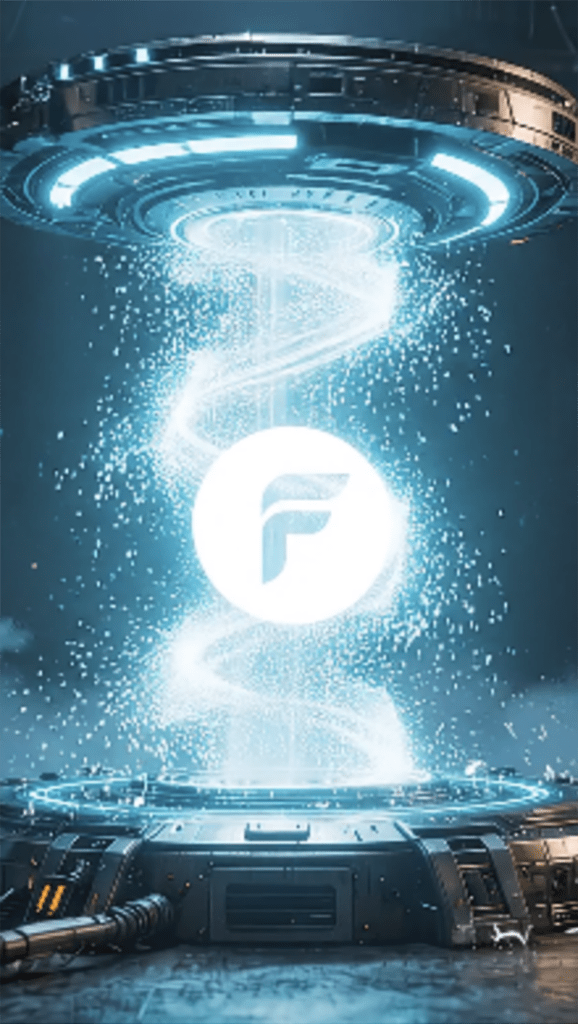
    This template was provided by FlexClip, but I customized it myself by adjusting the text and spacing and adding one of FlexClip’s logo animations at the end to make it feel more like my own. That process is a good example of where FlexClip actually stood out for me. The interface is clean, easy to use, and clearly built for fast, structured video creation. The templates are strong, the transitions are good, and it feels beginner-friendly in a way that makes it easy to build something polished without a lot of friction.

    Where FlexClip works best is in quicker, template-based projects where speed and structure matter more than detailed manual editing. The biggest downside is precision. It doesn’t have the spacing tools the way Canva does, so if you’re used to that kind of layout control, you’ll notice the difference right away. That was probably the only real usability issue that stood out to me.

    As for whether I’d use it over CapCut, in some cases, yes. I’m already very comfortable with CapCut and know my way around its interface, effects, transitions, and masking tools, so it’s still the more natural choice for detailed editing. But FlexClip surprised me enough that I’d definitely experiment with it more for certain projects, especially when I want faster builds, structured content, or something that doesn’t need as much manual refinement. It’s not a full CapCut replacement for me, but for the right kind of workflow, I could absolutely see myself using it more going forward.

    My Actual Workflow:

    1. Generate image (ChatGPT / VideoExpress / Nano Banana)
    2. Import into FlexClip if needed
    3. Animate using Kling or VideoExpress
    4. Export clips
    5. Final edit (FlexClip or CapCut)

    Final Thoughts (Honest Verdict)

    FlexClip isn’t positioned as an AI-first tool, and that’s actually part of its strength. Instead of focusing purely on generation, it’s built to help you create video with AI as part of a broader, easy-to-use workflow. The platform combines animation, editing, and templates, with AI features layered in to support the process rather than define it.

    That distinction matters. The real value isn’t just being able to generate something with AI, but being able to combine AI-assisted features, templates, editing, animation, and structure in one place. That’s what makes it genuinely useful in practice.

    Not because it replaces dedicated AI animation tools like Kling, and not because it competes with stronger editors like CapCut in every area, but because it fills a very practical middle ground. If your workflow involves slideshows, structured video content, light-to-moderate AI use, and fast template-based editing, FlexClip fits in really well. It’s not trying to be everything, and it doesn’t need to be. It’s a streamlined animation platform with built-in AI features, and for the right kinds of projects, it’s something I can absolutely see myself continuing to use.

    Even after publishing this, I’m still finding new tools inside FlexClip that shift how useful it is in a real workflow. Google Nano Banana is a good example of that. It’s one of those features that doesn’t stand out immediately, but once you use it, it can genuinely change how you approach content creation on the platform.

    More AI Image and Animation Tutorials

    If you want to go deeper into AI image creation and animation, these guides expand on the techniques used in this article:

    How to Craft Picture Prompts That Create Powerful AI Images
    Learn how to turn static images into cinematic animated scenes using modern AI animation tools.

    How to Animate AI Images: Step-by-Step Beginner Guide
    Learn how to turn static images into cinematic animated scenes using modern AI animation tools.

    How Generative AI Works: The Powerful Shift in AI Image Creation
    Understand how AI models interpret prompts and transform text into visual images.

    Best AI Writing Software for Creative Writing & Fiction (2026 Guide)
    Explore how AI writing tools can help spark character ideas and expand your fantasy stories.

    These guides walk through the creative side of building worlds, crafting prompts, and transforming AI images into cinematic visual stories.

    Frequently Asked Questions About FlexClip and AI Video Creation

    Q: So, what is the best AI video generator right now?

    A: Based on my testing with available models, Kling 2.1 is one of the best AI video generators available inside FlexClip. It offers the most consistent motion and the best transitions, especially when using start/end frames.

    Q: What is the easiest way to create video with AI?

    A: The easiest way to create video with AI is to start with a completed image, then animate it using a tool like FlexClip. This approach gives you more control and reduces failed generations.

    Q: Which AI video model is best in FlexClip?

    A: Kling 2.1 produced the best results overall. Hailuo is a more affordable option, but the motion and transitions are less consistent.

    Q: Is FlexClip worth it?

    A: Yes, but not as a standalone AI generator. It works best as a video creation platform with AI features, especially when combined with external tools for image generation.

    Q: How do you avoid wasting credits in AI video tools?

    A: Generate and refine images outside the platform first, then use AI tools only for animation. Avoid repeated generations and expensive models unless necessary.

    See the project in action on:

    Ready to level up your picture prompts and writing with a little AI magic?  Visit our homepage to explore tools, tips, and inspiration designed to help storytellers like you bring their worlds to life.

  • How to Edit AI Animation Clips into a Video in CapCut (2026)

    AI animation tools make it possible to transform a single image into a dynamic scene. Learning how to edit AI animation clips into a video is what turns those short generated moments into a polished animation with pacing, transitions, and storytelling.

    (Click to enlarge images above on smaller devices)

    However, most AI animation tools generate clips that last only a few seconds. On their own, these short segments can feel incomplete. Learning how to edit AI animation clips allows creators to combine these pieces into a cohesive sequence that feels polished and intentional. Editing gives you control over pacing, transitions, visual effects, and sound, helping transform a series of short clips into a cinematic and engaging animation.

    If you are new to this workflow, it can help to first understand how to animate AI images before moving into the editing stage. The process is often simpler than it seems. With the right prompt, tools like Kling AI, Hailou AI, or VideoExpress can turn a still image into a short animated clip in just a few steps. That animated clip becomes the starting point for the editing techniques covered in this guide. If you would like to learn more about how this process works, you can explore our guide on how to animate AI images or learn how strong picture prompts help shape the final animation.

    In this tutorial, we will walk through a simple workflow that demonstrates how to edit AI animation clips into a video in CapCut. The example uses a short fantasy animation where a mermaid rises from the ocean and transforms into a queen, illustrating how editing can shape a short AI clip into a small visual story.

    This guide shows how to edit AI animation clips in CapCut so short AI generated segments can be combined into smooth cinematic scenes.

    Full Disclosure:

    Parts of this blog post were written with the help of AI, but it was also refined with my own experience, personal voice, and hands-on testing. I also checked the content for plagiarism to make sure the explanations and structure were fully my own.

    What You’ll Learn in This Guide

    In this tutorial, you’ll learn how to:

    • Import AI animation clips into CapCut
    • Use a base image to create smoother animation starts
    • Structure clips to build a short visual story
    • Add transitions and visual effects carefully
    • Sync animation timing with music for cinematic impact

    Why Learning How to Edit AI Animation Clips Matters

    AI animation generators are excellent at producing motion, but they rarely produce a finished video on their own.

    Raw animation clips often have a few common problems:

    • Clips begin or end abruptly
    • Pacing feels rushed
    • Scenes feel disconnected
    • There is no music or atmosphere

    Instead of presenting a single AI generated clip, editing allows you to combine several moments into a cohesive visual sequence.

    Building a Short Story with AI Animation

    The animation used in this example follows a simple transformation story.

    Rather than creating a long scene, the goal was to build a short cinematic moment designed for Shorts-style video (9:16).

    The sequence unfolds like this:

    • A mermaid appears underwater
    • She swims toward the surface
    • Magical petals begin to appear
    • She transforms and rises as a queen

    Even though the animation lasts only a few seconds, the pacing and music make the scene feel intentional and dramatic.

    Short-form animations work especially well when they focus on one clear transformation or emotional moment.

    Step 1: Import AI Animation Clips into CapCut

    The first step in learning how to edit AI animation clips in CapCut is importing your generated clips so they can be arranged and refined on the timeline.

    Most AI animation tools produce clips that last 4–7 seconds, which makes them perfect for short-form storytelling.

    Once the clips are loaded into the timeline, they can be rearranged, trimmed, and synchronized with transitions or music.

    When editing AI animation clips, it helps to think about how the clips visually connect rather than treating each clip as a completely separate scene. The goal is to make the clips feel like part of one continuous moment.

    Step 2: Use the Base Image to Create a Smooth Start

    A simple editing technique that can significantly improve AI animations is placing the original generated image at the beginning of the timeline.

    Showing the base image briefly before the animation begins gives viewers a moment to clearly see the character before the scene starts moving. Because the animation is generated from that same image, the first frame typically matches the still image exactly. This creates a smooth transition into motion, allowing the character to begin moving naturally without any visual jump or shift.

    It also provides a small amount of flexibility when aligning the animation with music. Because the still image is visually identical to the first frame of the animation, it can be extended for a second or two without breaking continuity. This allows creators to fine-tune timing so the animation begins exactly where the music or transition feels most natural. Strong base images also help maintain visual consistency, ensuring the character design remains stable as the animation progresses.

    If you’re looking to improve your generated images before animating them, you may want to explore our guide on crafting powerful AI image prompts.

    Step 3: Structure the Timeline to Tell a Story

    After the still image introduces the mermaid, the animation clips take over. A key part of editing AI animation clips is arranging these short segments so they build naturally toward the final transformation.

    In this example, the clips were organized so the mermaid remains in her original form slightly longer before the transformation occurs. The early clips focus on her swimming upward, giving the scene time to develop before the petals appear and the final transformation happens. Even though the animation lasts only a few seconds, careful pacing and music help the moment feel intentional and cinematic.

    CapCut timeline showing AI animation clips with Rainbow Edge and Rose Video Effects.

    Short-form animations work best when they focus on a single transformation or emotional moment. In this case, the scene centers on a garnet-themed transformation, with the rose elements supporting the gemstone and royal aesthetic.

    Step 4: Add Transitions Between Clips

    Transitions help smooth the visual shift between animation clips.

    For this project, a Petal Wind transition (white box attached to both videos) was used between clips. This transition matches the rose theme used in the animation and visually reinforces the magical tone of the transformation.

    Transitions should generally remain subtle. Their purpose is to guide the viewer’s eye from one moment to the next without distracting from the story. Used carefully, transitions are one of the simplest ways to enhance AI animations.

    Step 5: Add Effects to Enhance the Scene

    Visual effects can help unify multiple clips so they feel like part of the same magical environment.

    Two effects were used in this animation:

    (A) Roses Video Effect

    The Roses Video Effect is applied only to the queen form, creating subtle rose movement that enhances the Rose Bloom transformation and reinforces the final reveal.

    (B) Rose Bloom Video Effect

    The Rose Bloom Video Effect intensifies the transformation moment. As the character transitions into a queen, the environment becomes brighter and more dramatic.

    (A)

    Clip with Both Effects

    (B)

    Small effects like these can dramatically improve the storytelling impact of short animations.

    Step 6: Add Character Effects for a Magical Look

    A Rainbow Edge Body Effect was applied to the character.

    This effect creates a glowing outline around the mermaid and queen, helping her stand out from the background while reinforcing the magical fantasy theme.

    When editing AI animation clips, it’s usually best to use effects sparingly. Small visual enhancements often feel more cinematic than heavy visual processing. Some effects can even introduce unwanted artifacts. For example, the Luminance Body Effect can occasionally cause subtle flickering between frames, which disrupts the smoothness of the animation.

    Step 7: Sync the Animation with Music

    Music can dramatically improve storytelling, even in very short videos. When learning how to edit AI animation clips, syncing visual moments with music is one of the easiest ways to make a scene feel cinematic.

    Lyrics referenced from the song “Shine Like A Queen” by Aera Lya. All rights belong to the original artist.

    The sequence aligns with the song’s progression.

    “Fire inside, it’s royalty…”

    During this moment, the character is still a mermaid swimming upward.

    As petals begin to appear, the music continues building.

    Then the lyric hits:

    “Shine like a queen, like the stars on a velvet screen.”

    This is the moment where the mermaid completes her transformation and emerges as a queen.

    The timing of each clip was adjusted to follow the build of the soundtrack, allowing the transformation to occur right as the music reaches its peak.

    CapCut Pro vs the Free Version

    I finished assembling the sequence in CapCut Pro so I could use the rose-themed effects and the music track that matched the mermaid’s transformation. CapCut Pro unlocks additional effects, transitions, and editing tools that make it easier when learning how to edit AI animation clips and experiment with visual storytelling.

    Another advantage of CapCut Pro is access to CapCut’s built-in music library, which includes a large selection of tracks that can be used directly inside your videos.

    The song used in this example, “Shine Like A Queen” by Aera Lya, was selected directly from the CapCut music library and synchronized with the animation to match key story moments. Because the music is provided inside CapCut, it can be easily aligned with transitions, effects, and visual beats during editing. Music available through CapCut Pro is generally licensed for use within the platform, which means creators can typically use these tracks in projects uploaded to platforms like YouTube. In some cases, automated systems may still flag the audio, but these claims can usually be reviewed or disputed since the track is part of the licensed CapCut Pro library.

    That said, you can still experiment with the free version of CapCut. Many of the core editing tools are available without a subscription, making it a great place for beginners to start learning how to edit AI animation clips.

    Try the Tools I Use and Love

    If you want to create the same style of cinematic scenes shown in this post, here’s my link to the exact tool I use:

    👉 VideoExpress AI:
    https://www.fantasyfusionai.com/go/videoexpress

    👉 Capcut:
    https://www.fantasyfusionai.com/go/capcut

    Once you understand how to edit AI animation clips, even a few seconds of AI generated motion can become a complete cinematic moment.

    Affiliate Link Disclosure:

    This article includes affiliate links. When you make a purchase using one of those links, I may earn a small commission. There’s no extra cost to you, and I only recommend software I actively use and trust.

    Full disclosure page:
    https://www.fantasyfusionai.com/affiliate-link-disclosure/

    More AI Image and Animation Tutorials

    If you want to go deeper into AI image creation and animation, these guides expand on the techniques used in this article:

    How to Craft Picture Prompts That Create Powerful AI Images
    Learn how to turn static images into cinematic animated scenes using modern AI animation tools.

    How to Animate AI Images: Step-by-Step Beginner Guide
    Learn how to turn static images into cinematic animated scenes using modern AI animation tools.

    How Generative AI Works: The Powerful Shift in AI Image Creation
    Understand how AI models interpret prompts and transform text into visual images.

    Best AI Writing Software for Creative Writing & Fiction (2026 Guide)
    Explore how AI writing tools can help spark character ideas and expand your fantasy stories.

    These guides walk through the creative side of building worlds, crafting prompts, and transforming AI images into cinematic visual stories.

    Frequently Asked Questions: Editing AI Animation Clips

    Q: How do you edit AI animation clips in CapCut?

    A: Creating a strong animation often depends on how the clips are arranged and timed. Placing each segment carefully on the timeline allows you to shape the pacing of the scene while using the music as a guide for the most impactful moments. In some cases, trimming a clip or briefly holding the opening frame can improve the flow of the sequence. Thoughtful use of transitions and visual effects can further enhance the atmosphere, and when everything aligns with the soundtrack, even a very short animation can deliver a memorable and emotionally engaging moment.

    Q: How can I enhance AI animations?

    A: You can enhance AI animations by improving pacing, adding subtle transitions, applying visual effects, and aligning the animation with music.

    Q: Why are AI animation clips usually short?

    A: Many AI animation tools output clips that last only a few seconds, which means the final scene often comes together by linking several short segments during editing.

    Q: Do AI animations work well for short-form video?

    A: Yes. AI animations are ideal for short-form platforms because they can quickly communicate visual stories in just a few seconds.

    Q: What video editor should beginners use?

    A: CapCut is one of the most beginner-friendly video editors available because its simple timeline interface and built-in effects make editing accessible for new creators.

    See the project in action on:

    Ready to level up your picture prompts and writing with a little AI magic?  Visit our homepage to explore tools, tips, and inspiration designed to help storytellers like you bring their worlds to life.

  • How to Animate AI Images: Step-by-Step Beginner Guide (2026)

    How to animate AI images is becoming one of the most exciting creative workflows for digital artists and storytellers. AI image generators make it easy to create stunning artwork, and modern AI animation tools now allow creators to turn static AI images into cinematic motion scenes. With the right prompts and workflow, a single AI image can evolve into a short animated clip using AI image animation tools and image-to-video technology. If you’re curious about the technology behind these systems, our guide on how generative AI works explains how AI models transform prompts into original images.

    This tutorial focuses on AI image animation for beginners, showing a simple workflow that anyone can follow to turn static AI artwork into motion.

    What Is AI Image Animation?

    AI image animation is the process of turning a static image into a short animated clip using AI image-to-video tools. These tools analyze the structure of an image and simulate motion such as camera movement, lighting changes, environmental effects, or character animation. Most creators follow a simple workflow: generate an image, animate the image using an AI animation tool, and refine the clip using video editing software.

    Basic AI Image Animation Workflow:

    1. Generate an AI image with strong lighting and composition
    2. Upload the image to an AI animation or image-to-video tool
    3. Generate motion such as camera movement or environmental effects
    4. Edit the animated clips together using a video editor
    How to animate AI images picture example before animation.

    Original Image

    Image with Animation, Effects, and Music

    But once you create a beautiful AI image, many creators quickly start asking the same question:

    How do you animate AI images?

    This guide explains a beginner-friendly workflow for turning still AI images into animated scenes. A single image can now become the beginning of a story. Instead of building animation frame by frame like traditional animation, creators can use AI tools to bring motion into a scene that once existed only as a still picture. With the right prompts and editing workflow, a static image can evolve into a cinematic moment.

    Most creators follow a simple process when learning how to animate static AI images:

    AI Image + AI Animation + Video Editing

    This step-by-step AI image animation tutorial will walk through the beginner workflow many creators use to transform still images into animated scenes. For creators learning step by step AI image animation, the process usually begins with creating a strong image that contains clear lighting, composition, and visual depth.

    Step 1: Create an Image for AI Image Animation

    The first step in the AI image animation process is creating a strong base image. AI animation tools analyze the structure of an image to determine how motion should behave, so images with clear lighting, strong composition, and defined subjects tend to animate much more naturally. When generating images that will later be animated, it helps to think about the scene as if it were part of a film.

    A simple prompt structure that works well is:

    Subject + Environment + Lighting + Atmosphere

    For example, instead of prompting something basic like:

    (A) A dragon flying over a castle

    You might create a more cinematic prompt:

    (B) A massive traditional European dragon flying past the viewer in a dramatic close side profile, its large wings attached to powerful shoulders and spread wide mid-flight. The dragon has a long reptilian neck, defined snout, sweeping horns, and layered reptilian scales across a muscular body. Two strong forelegs hang naturally beneath the chest with five clearly defined claws on each hand, arranged like a reptile or lizard hand with five separate fingers, gripping slightly as it flies. The wings are separate structures attached to the shoulders, with long wing bones supporting the membrane and not forming the claws of the forelegs. Two powerful hind legs trail behind with large talons, and a long tail flows through the air ending in a sharp spear-shaped tip. Warm golden sunset light illuminates the dragon from the front and side so the scales, claws, and wing membranes are clearly visible rather than silhouetted. Below, a sprawling medieval stone castle with tall towers and battlements rises from a rocky hill surrounded by forests and distant mountains while the dragon banks powerfully through the sky with strong wingbeats, creating a dynamic cinematic fantasy scene full of light, detail, and epic scale.

    This type of prompt with more detail provides the AI with much more visual context, which often results in stronger animation later. Understanding how to animate AI images begins with creating a strong base image that contains clear lighting, composition, and visual structure. Using the formula above, you can collaborate with ChatGPT to refine and improve your prompts for stronger results. Prompt development is often an iterative process, and it may take a few adjustments to achieve the desired outcome. Certain subjects, such as dragons, often require additional specificity to render accurately, which is why detailed descriptions of anatomy and structure can be important when crafting effective prompts.

    (A)

    (B)

    (C)

    (C) Epic fantasy scene, a large dragon with glowing eyes soars powerfully through the air, wings beating rhythmically. Beneath, a medieval castle stands proudly atop a hill, its stone walls catching the warm light. Trees sway gently in the breeze around the castle. Mist drifts slowly through the distant mountains. Cinematic, wide-angle shot with a slow, upward camera pan following the dragon’s flight.

    Many fantasy creators actually begin by developing their worlds, characters, and lore before generating images or animation. If you’re building deeper story worlds, our guide to the best AI writing software for creative writing and fiction explores tools that help authors design magic systems, cultures, and character arcs.

    If you want to learn more about building effective prompts, you can read our guide here:

    Better prompts almost always lead to better AI animation results.

    Pro Tip: Inspect Your Image Carefully Before Animating

    Before animating anything, take a moment to examine the image closely.

    AI generated images sometimes contain small visual errors such as:

    • Extra fingers (you don’t want an Ariana Grande Vogue moment)
    • Unusual hand shapes
    • Distorted limbs
    • Strange background artifacts or AI slop

    These issues may not be obvious when the image is still, but they can become very noticeable once motion is introduced. Many AI animation tools attempt to correct these issues automatically, but it’s always safer to catch them beforehand. A small visual error can sometimes ruin an otherwise beautiful animation.

    Developing a careful eye for detail will save time and frustration later in the process.

    Step 2: Animate the Image Using AI Image Animation Tools

    Once you have a strong image, the next step is generating motion.

    This process is commonly referred to as AI image animation or AI image-to-video animation. Many modern tools make it easy to animate static AI images, allowing creators to transform still artwork into moving scenes with minimal editing. When learning how to animate AI images, most creators experiment with several motion prompts before finding the animation that best fits the scene.

    AI animation tools analyze the image and simulate motion such as:

    • Subtle camera movement
    • Environmental motion like wind or fog
    • Lighting changes
    • Character motion

    One tool many creators experiment with for this step is VideoExpress, which offers a lifetime access option so animations can be generated without worrying about credit costs.

    Affiliate Link Disclosure:

    This article includes affiliate links. When you make a purchase using one of those links, I may earn a small commission. There’s no extra cost to you, and I only recommend software I actively use and trust.

    Full disclosure page:
    https://www.fantasyfusionai.com/affiliate-link-disclosure/

    👉 VideoExpress AI:
    https://www.fantasyfusionai.com/go/videoexpress

    Tools like this generate short animated clips based on the image and motion prompts provided. Sometimes the first result works perfectly, while other times the AI produces something unexpected. AI image animation can be unpredictable, and it may take several attempts to achieve the desired motion. However, that unpredictability can also lead to surprisingly cinematic results that were never planned, and those unexpected moments are often where some of the most creative and magical outcomes appear.

    Pro Tip: Think About Camera Angles and Storytelling

    When learning how to animate static AI images, beginners often focus only on motion. However, what truly makes animation engaging is visual storytelling. Instead of jumping straight into character animation, it can be more effective to begin with an establishing shot that sets the scene and creates context for the viewer.

    Examples might include:

    • An aerial view of a tropical beach
    • A dewy morning in the forest
    • A futuristic cyberpunk city skyline with fog

    These types of shots help build atmosphere and give the animation a cinematic feel. Some creators sketch simple storyboards before animating. These sketches don’t need to be detailed. Even rough illustrations can help outline the sequence of scenes and camera movement.

    The goal isn’t artistic perfection but clarity. Seeing the overall vision laid out visually acts almost like a wireframe for the story, helping guide how the animation will flow and preventing endless rabbit holes of experimenting with prompts and animation ideas.

    Many modern AI tools are specifically designed to show creators how to animate static AI images, generating motion like camera movement, environmental effects, and subtle lighting changes.

    How to Create an AI Animation Avatar

    Creators are increasingly using AI animation tools to turn static portraits into talking avatars. Instead of animating environmental motion or camera movement, these tools focus on facial animation and lip syncing.

    The core AI animation workflow looks like this:

    1. Create an AI image
    2. Animate the image using an AI animation tool
    3. Refine the result using video editing software

    First, generate a clear portrait image. Characters with visible facial features tend to animate best because the AI needs strong visual reference points for the mouth, eyes, and facial structure. AI animation tools usually produce better results with human characters since most models are designed to track human facial structure and expressions. Animals and fantasy creatures can still work, but the animation may be less precise.

    Once the image is ready, many creators upload the portrait and combine it with an audio track. This audio can either be your own recorded voice or generated voice narration using text-to-speech tools such as ElevenLabs.

    Some platforms then analyze the audio waveform and generate lip movement that attempts to match the spoken words. The result is a short animated clip where the character appears to speak directly to the viewer.

    For example, tools like HEDRA AI allow you to upload an image, attach an audio clip, and automatically generate a lip-synced AI avatar animation. These clips are usually around ten seconds long and can be used for social media videos, storytelling projects, or animated character introductions. They can be edited just like any other video.

    Best AI Tools to Animate Images in 2026

    Several AI platforms now allow creators to animate static images or portraits. While each tool works slightly differently, most follow the same process: upload an image, provide motion or voice input, and let the AI generate a short animated clip.

    HEDRA AI
    One of the most popular tools for creating talking AI avatars. Hedra allows users to upload an image, attach voice audio, and automatically generate lip-synced animation. It performs especially well with human characters and portrait-style images.

    VIDEOEXPRESS AI
    VideoExpress focuses more on cinematic motion rather than facial animation. It can add environmental effects, camera movement, and subtle scene animation. While it does offer some character animation capabilities, many creators find its lip syncing less precise than specialized avatar tools.

    D-ID
    D-ID is another well-known platform designed specifically for talking avatars and digital presenters. It converts still portraits into speaking characters using AI voice or uploaded audio.

    Because AI animation tools evolve quickly, it’s always worth exploring several options and experimenting with different motion styles.

    Step 3: Refine Your AI Image Animation Using Video Editing

    When exploring how to animate AI images, video editing plays a major role in refining the final animation and improving pacing. AI animation tools generate motion, but the final storytelling often happens during the editing process. Once several animated clips are created, the next step is refining them using a video editor.

    Many creators use CapCut because it provides powerful editing tools while still remaining beginner friendly.

    Affiliate Link Disclosure:

    This article includes affiliate links. When you make a purchase using one of those links, I may earn a small commission. There’s no extra cost to you, and I only recommend software I actively use and trust.

    👉 Edit and refine your animations with CapCut
    https://www.fantasyfusionai.com/go/capcut

    Video editors allow you to enhance your animation by adding:

    • Music
    • Transitions
    • Pacing adjustments
    • Visual effects
    • Layered scenes
    • Adjustments to video like brightness or contrast

    CapCut also offers masking tools, which can be especially useful for fantasy storytelling. Masking allows you to isolate parts of a scene and add effects such as glowing magic, drifting fog, or atmospheric lighting. These techniques can dramatically elevate the final animation. Video editing is often where creators learn how to create smooth AI animations, adjusting timing, transitions, and visual effects to make the motion feel more natural.

    Pro Tip: Music and Transitions Make a Huge Difference

    When learning how to create smooth AI animations, many beginners focus only on visuals.

    However, sound design and pacing can make an enormous difference.

    Try experimenting with:

    • Atmospheric music
    • Slow fade transitions
    • Subtle zoom effects
    • Layered environmental sounds

    Even simple animations can feel cinematic when music, timing, and transitions are carefully balanced. This is especially powerful in fantasy environments where atmosphere plays a major role in storytelling.

    Step 4: Turn AI Image Animations Into a Complete Video

    Once several animated clips are generated, the final step is assembling them into a sequence.

    Instead of viewing each clip individually, think about the larger narrative.

    A simple structure might look like this:

    Scene 1 – Establish the environment
    Scene 2 – Introduce the character or magical element
    Scene 3 – Focus on the main cinematic moment

    Even short animations can feel powerful when pacing, lighting, and music work together.

    AI tools generate the motion, but creators shape the story.

    Common Problems When Animating AI Images

    Even though AI animation tools are becoming easier to use, creators often run into a few common challenges.

    Lip Sync Accuracy
    Talking avatar tools sometimes struggle to perfectly match mouth movement with speech. Certain words or fast dialogue may cause the animation to drift slightly out of sync.

    Credit-Based Pricing
    Many AI animation platforms operate using a credit system. Each animation generation consumes credits, which means experimenting with different prompts or motion styles can become expensive over time.

    Animal and Creature Animation
    While human faces tend to animate well, animals and fantasy creatures can sometimes behave unpredictably. AI models are typically trained on human facial data, which means non-human subjects may produce strange movement.

    Unexpected Motion
    AI animation is still probabilistic. Even when using the same image and prompt, the AI may generate different results each time. Sometimes the animation will look cinematic, and other times the motion may appear exaggerated or unrealistic.

    Because of this, creators often generate several versions before selecting the best animation clip.

    How to Animate AI Images for Beginners

    AI image animation is evolving quickly, but it has already opened new creative possibilities.

    Instead of mastering complex frame-by-frame animation techniques, creators can focus on:

    • Storytelling
    • Cinematic composition
    • Atmosphere and mood
    • Scene design

    The AI generates the motion while the creator directs the vision. With the right workflow, a single image can evolve into a cinematic animated moment.

    Continue Learning AI Image Creation

    If you want to explore more tutorials on AI image creation, prompt design, and animation workflows, these guides expand on the concepts discussed in this article.

    How to Edit AI Animation Clips into a Video in CapCut (Easy Beginner Guide 2026)
    Edit and combine short AI animation clips in CapCut to create smoother cinematic sequences, using simple timing, transitions, and effects that transform a few seconds of AI motion into a polished animated scene.

    How to Craft Picture Prompts That Create Powerful AI Images
    Discover how prompt structure influences lighting, composition, and cinematic storytelling in AI image generation.

    Best AI Writing Software for Creative Writing & Fiction (2026 Guide)
    Explore how AI writing tools can help spark character ideas and expand your fantasy stories.

    How Generative AI Works: The Powerful Shift in AI Image Creation
    Understand how modern AI models interpret prompts and generate entirely new images through advanced text-to-image systems.

    These guides explore the creative side of modern AI tools, from prompt engineering and worldbuilding to transforming static images into cinematic visual stories.

    FAQ: How to Animate AI Images

    Q: What does it mean to animate AI images?

    A: To animate AI images means turning a static AI-generated picture into motion using AI animation tools. These tools analyze the image and generate movement such as camera motion, environmental effects like fog or wind, and subtle lighting changes. Learning how to animate AI images allows creators to transform still artwork into short cinematic scenes.

    Q: What AI tools animate images?

    A: Several AI tools allow creators to animate static images. Platforms like Hedra AI focus on facial animation and lip syncing, while tools such as VideoExpress generate cinematic motion effects like camera movement and environmental animation. Other tools like D-ID specialize in talking avatar generation from portrait images.

    Q: Can you animate a photo with AI?

    A: Yes. Modern image-to-video AI tools can animate a single photograph by simulating motion such as facial expressions, camera movement, lighting changes, or environmental effects. These tools analyze the structure of the image and generate motion automatically.

    Q: What is AI image-to-video?

    A: AI image-to-video refers to technology that converts a still image into a short animated clip. The AI analyzes visual elements in the image and generates motion such as camera movement, environmental effects, or character animation. This process allows creators to turn static AI artwork into dynamic scenes without traditional animation.

    Q: Can you animate static AI images?

    A: Yes. Many modern AI tools allow creators to animate static AI images automatically. Image-to-video AI systems analyze the structure of the picture and simulate movement like camera pans, environmental motion, or animated characters. This makes it possible to create short animated clips from a single still image.

    Q: Is AI image animation for beginners difficult?

    A: Not at all. AI image animation for beginners is much easier than traditional animation because AI tools generate the motion automatically. Instead of drawing every frame manually, beginners simply create a strong image, generate motion using an AI animation tool, and refine the clip using simple video editing software.

    Q: What is the easiest workflow for AI image animation?

    A: A simple step by step AI image animation workflow usually looks like this:

    AI Image + AI Animation Tool + Video Editing

    Creators first generate a strong image, then use an AI animation tool to add motion, and finally refine the animation in a video editor.

    Q: How do you create smooth AI animations?

    A: To create smooth AI animations, start with an image that has clear lighting, strong composition, and well-defined subjects. These elements help AI animation tools simulate more natural movement. After generating motion, video editing tools can improve smoothness by adjusting timing, transitions, and pacing.

    Q: What types of scenes work best for AI image animation?

    A: Scenes with atmosphere and depth usually animate the best. Examples include forests with drifting fog, ocean waves, cyberpunk city skylines, magical fantasy environments, and cinematic landscapes. These scenes allow AI tools to add environmental motion that feels natural and immersive.

    Q: Can AI animation tools create cinematic effects?

    A: Yes. Many AI animation tools simulate cinematic motion such as slow camera movement, environmental effects, and lighting changes. When combined with music and editing, even a short animation created from a single image can feel like a cinematic moment.

    Q: Why do some AI animations look strange?

    A: AI animation tools sometimes exaggerate motion or misinterpret details in an image. Issues like distorted limbs or strange movement can occur if the base image contains small AI generation errors. Inspecting the image before animating and generating multiple animation attempts often produces better results.

    Q: Can AI animate a character from a single image?

    A: Yes. Modern image-to-video AI tools can animate a single character image by generating motion such as facial movement, environmental effects, or camera motion. Some tools specialize in talking avatars and lip syncing, while others focus on cinematic animation of scenes and environments.

    Q: What is the future of AI image animation?

    A: AI image animation is evolving quickly. As AI models improve, creators will have more control over motion, storytelling, and cinematic effects. Learning how to animate AI images now allows artists and storytellers to experiment with new forms of visual storytelling that blend AI art, animation, and video editing.

    See the project in action on:

    Once you understand AI image animation for beginners, you can start experimenting with more advanced techniques like cinematic camera motion and layered scene effects. For fantasy creators, storytellers, and digital artists, learning how to animate AI images opens new possibilities for visual storytelling. Many creators combine writing, world building, and AI art to bring their ideas to life. If you’re exploring tools, tutorials, and creative workflows designed for fantasy artists and storytellers, you can explore more guides and resources on the Fantasy Fusion AI homepage.

  • How to Craft Picture Prompts That Create Powerful AI Images

    Update — March 6, 2026:
    This guide has been updated with improved formatting, helpful internal links to related articles, and a new FAQ section to make the content easier to navigate.

    (Click to enlarge images above on smaller devices)

    I’ve been spending a lot of time testing picture prompts inside VideoExpress AI lately. It feels freeing to work with a tool that lets me generate as much as I want without worrying about credits running out. When you create every day, that kind of freedom changes everything. AI can be unpredictable, but sometimes it hands you something magical. Other times you use AI image prompts that gives you an image that feels like a dream (or nightmare) you can’t quite explain. Instead of fighting that unpredictability, I like using it as part of the creative process and guide it with clear cinematic direction.

    Tools like VideoExpress, Hailou AI, and Leonardo AI now offer built-in prompt enhancers, but I still prefer crafting my picture prompts in CHATGPT first. It gives me room to explore mood, tone, lighting, and emotional rhythm before bringing the idea into whatever AI animation software I’m using. A prompt with intention hits differently, especially when your goal is creating AI scenes that feel like tiny films instead of random outputs from an art inspiration generator. No one likes AI slop.

    The approach I use is simple and works for portraits, fantasy characters, creatures, landscapes, or anything you want to bring to life — whether you’re experimenting with AI image prompts or building a consistent AI fantasy gallery:

    Subject + Environment + Lighting + Atmosphere + Motion Intention

    This structure transforms your ideas into miniature cinematic stories. It also sets the foundation for more expressive AI generated animation. Below are three fully original prompt engineering examples showing how stronger picture prompts lead to better AI image prompts and cinematic results, perfect for TikTok, Reels, Shorts, or animated blog content.

    Why AI Needs Clear Direction

    AI models blend visual patterns from huge datasets. When your picture prompts are vague, the model fills in the gaps with guesses, which is why simple AI image prompts often feel disconnected from what you imagined.

    Once you guide these pieces, unpredictability becomes creativity instead of chaos.
    This is also how you get closer to some of the best AI image results without relying on luck.

    Clear, intentional prompting helps the AI understand:

    • What matters in the scene
    • What the emotional tone should be
    • How the light behaves
    • How the camera should move

    Full Disclosure:

    Parts of this blog post were written with the help of AI, but it was also refined with my own experience, personal voice, and hands-on testing. I also checked the content for plagiarism to make sure the explanations and structure were fully my own.

    The prompts included here are not “original writing” in the literary sense — they are functional AI instructions created with the help of ChatGPT and shaped through real-world experimenting inside VideoExpress AI. Their wording often overlaps with standard cinematic terminology used across many tools, which is normal for prompt engineering.

    1. Photorealistic Portrait in 9:16

    Mediocre Prompt

    “A woman in the forest”

    Better Prompt

    “A woman standing in a forest at sunset”

    Best Prompt

    Image:

    “A woman with long brown hair in a long sleeved shirt and denim jeans , in photorealistic style, walks along a forest trail with tall pines above her, shadows draping across the ground. The warm light catches her face.”

    Video:

    A woman, in photorealistic style, walks along a quiet forest trail. The camera starts low, focusing on her feet stepping rhythmically on the path, kicking up small puffs of dust. As she walks, the camera smoothly tilts upward in one continuous, slow motion, revealing her legs in denim jeans, then her torso in a casual tee. Her long brown hair sways gently as she glances around, a soft smile playing on her lips. The camera continues its rise, ending high among the tops of the towering pine trees as their needles sway slightly in the breeze. Vertical 9:16 view with gentle camera movement.”

    2. Stylized 3D Magic Character in 9:16

    A Pixar-style girl holding a small magical light, an example of how picture prompts influence the best AI image results for storytelling AI.

    Mediocre Prompt

    “A girl casting magic”

    A stylized girl conjuring soft golden magic in a colorful forest, showing how prompt engineering examples shape expressive AI animation software outputs.

    Better Prompt

    “A girl casting magic in a colourful forest”

    Best Prompt

    Image:

    “A young mage with dark curly hair tied in a ponytail, wearing a tan witch hat, carefully holding a magical glowing orb in her open palms. She is dressed in a red coat over a green dress, smiling softly as she gazes at the light. Illustrated in a playful Pixar-inspired style stands in a sunlit clearing where loose leaves drift lazily through warm air. A sphere of soft glowing magic gathers between her hands, sending tiny shimmering flecks upward. She has a delighted expression on her face.”

    Video:

    “3D animation style, a cute young girl with dark curly hair tied in a ponytail, wearing a tan witch hat, carefully holding a magical glowing orb in her open palms. She is dressed in a red coat over a green dress, smiling softly as she gazes at the light. Leaves gently drift down around her. Her ponytail bounces slightly as she breathes. The magical light flickers and pulses with energy. Soft, diffused sunlight filters through the trees, creating dappled shadows. The camera slowly dollies forward, tightening the focus on the magical light in her hands.”

    3. Tropical Beach in 9:16

    A warm tropical beach at sunset with glowing light on the water, used in the article to illustrate environmental picture prompts for creating AI landscapes.

    Mediocre Prompt

    “A tropical beach at sunrise”

    A dreamy coastal sunset with soft pink tones and gentle waves, part of an AI images gallery demonstrating atmospheric scene prompting.

    Better Prompt

    “A tropical sunrise with soft peach and lavender tones in the sky, gentle waves catching subtle warm highlights, palms swaying lightly.”

    Best Prompt

    Image:

    “From a gentle aerial angle above the shoreline, a bright tropical beach stretches into view. The water closest to shore glows a soft mint-cyan, deepening into rich turquoise as waves curl and break over smooth sand. Palm trees lean toward the coast, casting long morning shadows that sweep diagonally across the beach. The perspective sits high enough to feel airborne but tilted just enough to show the curve of the coastline, giving the scene depth and a dreamy, sunlit atmosphere.”

    Video:

    “The camera glides forward at an angled aerial tilt, traveling parallel to the shoreline. It looks down toward the sand as waves roll in, leaving bright foam trails that fade back into turquoise water. The sunlight flickers across shifting reflections on the surface as the camera moves. Palm trees sway gently on the right, their shadows stretching and shifting across the sand. The motion is smooth and cinematic, keeping the angled perspective while drifting along the coast. Subtle wind rustles the palm leaves. The waves ripple realistically. Tall 9:16 frame.

    How I Refine Prompts Using Images

    Even though that little equation (Subject + Environment + Lighting + Atmosphere + Motion Intention) gives you a strong foundation, I still refine almost every prompt with ChatGPT. It elevates your work, but you still have to guide the moment.You still have to shape the wording, try different angles, and work with the AI instead of assuming it will land perfectly on the first try.

    Most of the time, it’s easier for me to just upload pictures and let ChatGPT analyze what’s working and what isn’t. Through that back-and-forth, I’ve built a whole library of characters — some wonderfully consistent, others delightfully chaotic — as we “sculpt” the best generative AI picture we can. It’s an iterative process, and honestly, that’s part of what makes this whole workflow fun (but also sometimes frustrating).

    How VideoExpress AI Interprets Prompts

    Think of the image prompt as your starting point. It sets the mood, lighting, environment, and intention — basically the backbone of your scene. But VideoExpress also has its own prompt helper, and that little assistant will sometimes adjust or reinterpret your words when it generates the animation. That’s why the image prompt and the video prompt don’t always match exactly.

    And honestly? Sometimes the helper actually improves things. It adds little motion cues, refines the phrasing, or takes a cinematic angle you didn’t even think of. Other times, it veers off in a direction you weren’t expecting. This is where you start learning how to work with the software instead of trying to force it into a box. AI is unpredictable, but every so often VideoExpress uses that unpredictability to surprise you in a good way.

    A Quick Reality Check About AI Unpredictability

    Even with strong picture prompts and clear direction, AI can still be… AI. Some days everything aligns and you get exactly the cinematic moment you imagined. Other days the model decides to give you a surreal dream that makes you wonder if it’s playing a trick on you.

    In VideoExpress specifically, negative prompts are hit or miss. Adding “no extra limbs” or “no strange hands” can absolutely help — but sometimes removing negatives entirely gets you better results. You never know. It’s unpredictable like that. You’re basically learning a new visual language together.

    And while VideoExpress already has great tools, some features (like inpainting) are still being refined. But after spending a lot of time inside Leonardo AI and Hailou AI, it becomes clear that this isn’t a VideoExpress issue — it’s just where ai generated animation is right now. The entire field is evolving at hyper-speed, and some quirks are simply part of the process of experimenting with something so new.

    The upside is that with VideoExpress, you’re not burning through credits every time you revise a prompt or retry a scene. You can experiment freely without feeling punished for learning, and honestly, that freedom is what makes the frustrations tolerable. When a scene finally clicks, it feels worth every odd output along the way.

    VideoExpress AI: Which Plan Makes Sense for You?

    Because I use VideoExpress AI for most of my animation work, here’s a simple breakdown of the two plans for you.

    Basic Plan — $49 One-Time

    Short version:

    Great for beginners and hobbyists. Be warned though that if you decide to upgrade later, you’re not getting a discount on the full version.

    All-Access Plan — $179 One-Time

    Short version:

    A full creative studio for storytellers, YouTubers, animators, and anyone who wants consistent characters across multiple videos.

    Exporting: 16:9 or 9:16 Only

    VideoExpress exports in just two orientations:

    • 16:9 landscape (perfect for YouTube)
    • 9:16 vertical (ideal for TikTok + Instagram Reels)

    It actually simplifies your workflow because you never have to guess which format to use — you just pick based on where the video will live.

    Continue Learning AI Image Creation

    If you want to go deeper into AI image creation and animation, these guides expand on the techniques used in this article:

    How to Edit AI Animation Clips in CapCut: Easy Beginner Guide (2026)
    Edit and combine short AI animation clips in CapCut to create smoother cinematic sequences, using simple timing, transitions, and effects that transform a few seconds of AI motion into a polished animated scene.

    How to Animate AI Images: Step-by-Step Beginner Guide
    Learn how to turn static images into cinematic animated scenes using modern AI animation tools.

    How Generative AI Works: The Powerful Shift in AI Image Creation
    Understand how AI models interpret prompts and transform text into visual images.

    Best AI Writing Software for Creative Writing & Fiction (2026 Guide)
    Explore how AI writing tools can help spark character ideas and expand your fantasy stories.

    These guides walk through the creative side of building worlds, crafting prompts, and transforming AI images into cinematic visual stories.

    I Prefer to Edit My Final Videos in CapCut

    VideoExpress includes its own built-in video editor, but I still finish my videos in CapCut. It’s the editor I feel fastest and most comfortable with, especially for text, timing, transitions, effects, music, pacing, masks and final polish.

    So my workflow looks like this:

    VideoExpress AI = cinematic motion + animation engine
    CapCut = final editing + cleanup

    And even with that split workflow, I genuinely love using VideoExpress as the starting point for all my animations.

    Try the Tools I Use and Love

    If you want to create the same style of cinematic scenes shown in this post, here’s my link to the exact tool I use:

    👉 VideoExpress AI:
    https://www.fantasyfusionai.com/go/videoexpress

    👉 Capcut:
    https://www.fantasyfusionai.com/go/capcut

    Affiliate Link Disclosure:

    This article includes affiliate links. When you make a purchase using one of those links, I may earn a small commission. There’s no extra cost to you, and I only recommend software I actively use and trust.

    Full disclosure page:
    https://www.fantasyfusionai.com/affiliate-link-disclosure/

    Frequently Asked Questions for Crafting Better AI Picture Prompts

    Q: What makes a good picture prompt for AI images?

    A: A strong picture prompt usually includes a clear subject, environment, lighting style, and atmosphere. Adding cinematic direction or camera movement can help AI models generate more visually consistent results.

    Q: Why do detailed prompts produce better AI images?

    A: AI models interpret prompts by referencing patterns learned from large datasets. When prompts include more descriptive context, the model has clearer guidance for lighting, composition, and subject behavior.

    Q: Do I need complex prompts to generate good AI images?

    A: Not always. Simple prompts can work, but adding environmental details, mood, and camera direction often produces more cinematic results.

    Q: Can prompts improve AI image animation?

    A: Yes. Strong prompts create clearer visual structure, which helps animation tools interpret motion more naturally when turning images into animated scenes.

    Q: What tools can help refine picture prompts?

    A: Many creators refine prompts using AI assistants like ChatGPT before sending them into image generators such as VideoExpress, Leonardo AI, or other generative tools.

    See the project in action on:

    Ready to level up your picture prompts and writing with a little AI magic?  Visit our homepage to explore tools, tips, and inspiration designed to help storytellers like you bring their worlds to life.

  • Best AI Writing Software for Creative Writing & Fiction (2026)

    Update — March 6, 2026:
    This guide has been updated with improved formatting, helpful internal links to related articles, and a new FAQ section to make the content easier to navigate.

    Fantasy worldbuilding is one of the most complex and rewarding parts of fiction writing. The right AI writing software can help fantasy and sci-fi authors design magic systems, cultures, lore, and long-term character arcs while maintaining structure and consistency.

    If you’re searching for the best AI for creative writing or the best AI for writing fiction, this guide compares the top platforms built specifically for story development. From drafting tools to advanced story writing AI systems, these AI tools for writers can accelerate your workflow without replacing your creative voice.

    Best AI Writing Software for Creative Writing in 2026

    The following AI writing platforms are among the most useful tools for fantasy and fiction authors in 2026, especially when it comes to worldbuilding, drafting scenes, and maintaining narrative consistency.

    Worldbuilding in fiction refers to the structured creation of immersive environments, including cultures, magic systems, political structures, geography, timelines, and character arcs. For fantasy and sci-fi writers, strong worldbuilding ensures consistency, depth, and long-term storytelling cohesion.

    Not all AI writing tools are equally strong at worldbuilding. Some excel at deep lore creation and magic system design, while others are better suited for drafting prose, expanding character arcs, or polishing structure.

    When evaluating the best AI for worldbuilding in 2026, authors should look for tools that excel in:

    • Lore generation
    • Magic system design
    • Character arc development
    • Timeline continuity tracking
    • Culture and political structure creation

    Below, we compare leading AI platforms specifically through the lens of worldbuilding strength rather than general writing capability.

    1. ChatGPT – Is It the Best AI for Worldbuilding and a Top Fantasy Writer AI?

    OpenAI’s ChatGPT serves as a versatile AI book writer for fantasy, aiding in brainstorming, outlining, and even crafting entire fantasy cultures.

    For authors searching for the best AI for creative writing or fiction development, ChatGPT remains one of the most flexible AI writing platforms available today.

    Key Features for Fantasy Writers:

    • Idea Generation: Generate names, plot lines, and magical items effortlessly.
    • World-Building Support: Design fantasy realms, cities, and governmental structures.
    • Dialogue and Emotional Arcs: Craft compelling scenes and genre-appropriate conversations.
    • Language Construction: Develop grammar and vocabulary for fictional languages.
    • Visual World-Building: Utilize GPT-4o’s image generation capabilities to create character portraits, maps, and magical artifacts. 

    Sample Prompt:

    “Enchanted meadows bloom with glowing flowers, while golden fireflies swirl beneath a sky brushed in lilac, sapphire, and rose.”

    (Click to enlarge image on smaller devices)

    The final output in Leonardo AI can differ significantly based on the model you choose. CHATGPT can generate rich backstories, societal frameworks, and evocative descriptions.

    Pricing:

    • Free Plan: Free access with basic capabilities and usage limits; exact model access may vary.
    • ChatGPT Plus: ~$20 USD/month with access to more advanced models (e.g., GPT-4o or GPT-5 series), faster responses, higher usage limits, and priority access.
    • ChatGPT Pro: ~$200 USD/month, aimed at professionals with even higher limits and advanced capabilities.
    • OpenAI also offers Team, Business and Enterprise tiers with custom pricing and additional enterprise features.

    Since plans aren’t static, it’s best to confirm current pricing and features on the provider’s own website.

    Why It’s Worth It:

    Fast, flexible, and continually evolving, ChatGPT is ideal for ideation, drafting, and visual inspiration—a top pick for instant world-building. Check out CHATGPT for more information.

    If you’re focused primarily on the best AI for fantasy writing — especially tools designed to expand scenes, deepen character arcs, and polish prose — these options shine.

    2. Sudowrite: AI Writing Assistant for Fantasy Authors and Fiction Writers

    Sudowrite is an AI writing assistant made specifically for authors of fiction. It runs entirely in your browser and works smoothly alongside tools like Google Docs via copy and paste.

    Key Features for Fantasy Authors:

    • Scene & Plot Expansion: Advance your story when you encounter writer’s block.
    • Sense of Place: Enhance descriptions with sensory details to immerse readers.
    • Brainstorming Tools: Invent mythical creatures, spells, or prophecies.
    • Character Development: Create well-defined characters with rich backstories and internal struggles.

    Example Use Case:

    Struggling to write a captivating duel? With just a few clicks, Sudowrite can sharpen your descriptions, heighten emotion, and keep the pacing tight.

    Pricing:

    • Hobby & Student Plan: $10 USD/month (billed annually) or $19 USD/month (billed monthly), offering 225,000 credits/month.
    • Professional Plan: $22 USD/month (billed annually) or $29 USD/month (billed monthly), offering 1,000,000 credits/month.
    • Max Plan: $44 USD/month (billed annually) or $59 USD/month (billed monthly), offering 2,000,000 credits/month with credits rolling over month-to-month.

    Since plans aren’t static, it’s best to confirm current pricing and features on the provider’s own website.

    Why It’s Worth It:

    Sudowrite acts as a genuine co-author, especially beneficial when you’re navigating the complexities of your manuscript. Check out SUDOWRITE today.

    3. Jasper AI for Fantasy Writing, Blogging, and Story Development

    Originally gaining traction as a marketing copywriting tool, Jasper has expanded into creative writing, offering storytelling hooks and blog posts tailored to fantasy topics.

    Key Features for Fantasy Authors:

    • Story Starters & Hooks: Kickstart your narratives with compelling openings.
    • Character Bios and Arcs: Develop detailed character profiles and progression arcs.
    • Title Generators: Create captivating titles for your work.
    • SEO Blog Writing: Produce blog content optimized for search engines.

    Example Use Case:

    Craft SEO-friendly blogs like ‘Top 10 Magical Creatures in Dark Fantasy’ or outline your book’s back cover blurb before publishing.

    Pricing:

    • Creator Plan: No longer offered, but there is a 7 day free trial
    • Pro Plan: $59 USD/month (billed annually).
    • Business Plan: Custom pricing.

    Since plans aren’t static, it’s best to confirm current pricing and features on the provider’s own website.

    Why It’s Worth It:

    Jasper facilitates a smooth transition between storytelling and promotional content, making it a solid option for authors who also engage in blogging. Check out JASPER today.

    4. Grammarly for Polishing Fantasy Prose and AI-Assisted Writing

    Grammarly is a widely-used AI-powered editing tool, trusted by writers across genres—including fantasy. It ensures your prose is clean, consistent, and immersive, without compromising your unique narrative voice.

    Key Features for Fantasy Authors:

    • Grammar & Punctuation Checks: Maintain clarity and readability in your elaborate prose.
    • Style & Tone Suggestions: Ensure consistency in narrative voice and fantasy terminology.
    • Plagiarism Detection (Premium): Verify the originality of your work, especially when integrating AI-generated text.

    Example Use Case:

    Polish battle scenes or dialogue to enhance their impact and catch any inconsistencies or misspellings related to your fantasy world.

    Pricing:

    • Free Plan: Basic grammar and spelling checker.
    • Premium Plan: $12 USD/month (billed annually) or $30 USD/month (billed monthly).
    • Enterprise Plan: Custom pricing.

    Since plans aren’t static, it’s best to confirm current pricing and features on the provider’s own website.

    Why It’s Worth It:

    A refined manuscript significantly enhances reader engagement, especially crucial for self-publishing authors. Grammarly helps preserve your tone while ensuring clarity. Check out GRAMMARLY today.

    5. Writesonic AI for Fantasy Writing, World Building, and SEO Content

    Writesonic is a versatile AI writer, ideal for authors who also blog or create marketing content. It’s excellent for on-the-fly brainstorming or fleshing out lore.

    Key Features for Fantasy Authors:

    • Lore Creation: Generate names, relics, legends, or myths.
    • Scene-Building: Describe worlds, creatures, and magic systems.
    • Character Voice Tools: Develop distinct voices for your characters.
    • SEO Blog Writing & Keywording: Optimize content for search engines.

    Example Use Case:

    Need a list of magical items? WRITESONIC can generate names, powers, and histories that align with your fantasy world swiftly.

    Pricing:

    • Lite Plan: $39 USD/month (billed annually).
    • Standard Plan: $79 USD/month (billed annually).
    • Professional Plan: $199 USD/month (billed annually).
    • Advanced Plan: $399 USD/month (billed annually).

    Since plans aren’t static, it’s best to confirm current pricing and features on the provider’s own website.

    Why It’s Worth It:

    A quick method for generating content ideas and writing for SEO. While powerful, some users might prefer more affordable AI tools offering similar features. Check out WRITESONIC today.

    6. Justdone AI: All-in-One AI Tool for Fantasy World Building and Writing

    Justdone AI offers over 130 tools within a single dashboard, making it an excellent all-in-one platform for fantasy writers seeking a comprehensive writing and editing suite.

    Key Features for Fantasy Authors:

    • Fantasy-Focused Templates: Utilize templates tailored for fantasy writing.
    • Lore and World Building: Develop intricate worlds and backstories.
    • Dialogue and Scene Editors: Refine conversations and scenes for impact.
    • Plagiarism and Grammar Tools: Ensure originality and correctness.
    • Built-in AI Chat Assistant: Receive real-time assistance during writing.

    Example Use Case:

    Creating a society within a sentient forest? JUSTDONE AI can assist in crafting the world’s history, political structure, and magic system within the same workflow.

    Pricing:

    • 7-Day Access: $2, then $39.99 USD/month.
    • Unlimited Monthly Plan: $19.99 USD/month.
    • Unlimited Annual Plan: $9.99 USD/month.

    Since plans aren’t static, it’s best to confirm current pricing and features on the provider’s own website.

    Why It’s Worth It:

    Price recently lowered. A writer’s dream playground, offering a comprehensive suite of tools like a plagiarism checker, grammar polisher, and text humanizer—great for prolific writers. Check out JUSTDONE AI today.

    What Makes the Best AI for Creative Writing?

    The best AI for creative writing should go beyond simple text generation. Strong AI writing software must support long-form storytelling, character continuity, and deep worldbuilding.

    Modern story writing AI platforms can help authors outline novels, expand scenes, refine dialogue, and maintain consistent tone across chapters. For many authors, these AI tools for writers function as drafting partners rather than replacements.

    How to Choose the Best AI Tool for Fantasy World Building

    Every AI writing software platform and story writing AI tool offers different strengths. Choosing the best AI for writing depends on whether you prioritize drafting speed, deep worldbuilding, or editing precision.

    • Use ChatGPT for brainstorming, lore, and fast iteration
    • Use Sudowrite when you’re actively drafting fiction
    • Use Jasper if you blog or market your fantasy projects
    • Use Grammarly for polishing prose and consistency
    • Use Writesonic for fast drafting and SEO-heavy content
    • Use Justdone AI if you want everything in one dashboard

    Final Note: How Gen AI Tools Empower Fantasy Writers

    Writing fantasy is thrilling but complex. The right AI writing software and online writing tools for writers don’t replace your imagination—they amplify it. Whether you’re crafting a dragon-ruled empire, weaving intricate forest politics, or shaping a hero’s journey, a smart storyline generator can tackle repetitive tasks, smooth out plot twists, and polish your prose writing.

    These online writing tools support every step, from idea generation to final edits, helping you focus on storytelling instead of getting stuck in the details. Whether you’re outlining an epic saga or experimenting with a new world, AI accelerates the process, making your writing clearer and more confident.

    Bottom line: AI isn’t here to write your story for you, but as a trusted AI book writer for fantasy authors, it can make writing easier, faster, and less stressful.

    Continue Learning AI-Powered Creativity

    If you want to go deeper into AI image creation and animation, these guides expand on the techniques used in this article:

    How to Edit AI Animation Clips into a Video in CapCut (Easy Beginner Guide 2026)
    Edit and combine short AI animation clips in CapCut to create smoother cinematic sequences, using simple timing, transitions, and effects that transform a few seconds of AI motion into a polished animated scene.

    How to Craft Picture Prompts That Create Powerful AI Images
    Learn how to structure prompts that generate cinematic AI art, detailed characters, and immersive fantasy environments.

    How to Animate AI Images: Step-by-Step Beginner Guide
    Learn how to turn static images into cinematic animated scenes using modern AI animation tools.

    How Generative AI Works: The Powerful Shift in AI Image Creation
    Understand how AI models interpret prompts and transform text into visual images.

    These guides walk through the creative side of building worlds, crafting prompts, and transforming AI images into cinematic visual stories.

    Frequently Asked Questions About AI Writing Software

    Q: What is the best AI writing software in 2026?

    A: The best AI writing software in 2026 depends on your workflow. For many authors searching for the best AI for creative writing or advanced story writing AI tools, platforms like ChatGPT and Sudowrite lead the market.

    Q: What Makes AI Writing Software Effective for Fiction?

    A: The best AI writing software for fiction authors should support:

    • Long-form story writing
    • Character memory and continuity
    • Lore and worldbuilding management
    • Drafting assistance
    • Editing and polishing tools

    Strong story writing AI platforms don’t just generate paragraphs — they help structure entire novels while keeping tone and voice consistent.

    Q: Can AI help write a fantasy book?

    A: AI tools can assist with outlining, worldbuilding, and refining prose, but they work best as creative partners rather than replacements for the author’s vision.

    Q: Are AI tools for writers safe for original fiction?

    A: Yes, when used responsibly. Most fantasy authors use AI for ideation and refinement while ensuring the final narrative voice and structure remain their own.

    Q: Should fantasy authors use an AI book writer?

    A: Fantasy authors often use AI tools to brainstorm ideas, develop lore, refine drafts, and explore FANTASY AI ART without losing their unique voice. Many authors use an AI book writer for fantasy to support world building and drafting while keeping full creative control.

    See the project in action on:

    When used strategically, the best story writing AI helps authors maintain consistency across characters, lore, and long-form storytelling.

    Ready to level up your writing with a little AI magic?  Visit our homepage to explore tools, tips, and inspiration designed to help storytellers like you bring their worlds to life.

  • How Generative AI Works: The Powerful Shift in AI Image Creation

    Update — March 6, 2026:
    This guide has been updated with improved formatting, helpful internal links to related articles, and a new FAQ section to make the content easier to navigate.

    AI image creation has evolved dramatically as artificial intelligence has progressed over the past several decades, transforming how generative AI works in creative industries. In its earlier forms, AI was built to perform narrowly defined tasks by following explicit instructions encoded in algorithms and rule sets. These early systems relied on structured data and predetermined logic to handle problems such as identifying fraudulent transactions, forecasting sales activity, or automating routine business processes.

    Their advantage was precision and efficiency within tightly controlled boundaries. But because these systems operated entirely on preset rules and historical examples, they lacked the ability to invent, imagine, or produce anything truly original. The limits of those older approaches set the stage for today’s newer, more creative forms of AI.

    This guide explores how generative AI works compared to traditional AI through the lens of AI image creation, text to image AI systems, and modern creative workflows that transform prompts into original visual content.

    What Sets Generative AI Apart from Traditional AI?

    The fundamental difference between traditional AI and generative AI lies in their objectives and how they handle data. Traditional AI relies extensively on carefully prepared, labeled datasets to execute specific tasks governed by well-defined rules. For example, traditional AI might analyze past purchase history to recommend products or scan transaction records to flag suspicious behaviour. Its operations revolve around prediction and classification based on prior examples, and it often requires manual retraining or reprogramming to adjust to new scenarios.

    Generative AI takes a distinctly different approach. It thrives on large, often unstructured datasets and learns to generate entirely new content based on the patterns it discovers. Whether crafting paragraphs that read like human-written prose, creating photorealistic images from simple text prompts, or composing original melodies, gen AI embodies flexibility and inventiveness. It can even produce synthetic datasets, enhancing the training of other AI models by augmenting real data. This creative capability opens new horizons, allowing AI to participate in fields where originality and adaptation are crucial.

    How Generative AI Works in AI Image Creation

    To understand how generative AI works in AI image creation, it helps to look at text to image AI systems. These models analyze massive datasets of images and descriptions to learn patterns, styles, and visual relationships. When a user enters a prompt, the system generates a new text to picture result based on learned probabilities rather than copying existing artwork.

    This process powers many modern AI image generator tools used by artists, designers, and content creators.

    AI image creation example produced by generative AI using text to image AI tools.

    Examples of Gen AI

    Generative AI is already reshaping many industries and applications:

    • Text Generation: Tools like CHATGPT assist users in drafting emails, writing code, generating ideas, or even creating entire articles and stories with natural, human-like language.
    • Image Creation: Modern AI image generator tools such as LEONARDO AI and MIDJOURNEY AI power advanced text to image AI workflows, making AI image creation accessible to artists, designers, and marketers.
    • Music Composition: AI driven music platforms can compose new pieces or inspire musicians by suggesting melodies and harmonies.
    • Healthcare: In pharmaceutical research, gen AI accelerates drug discovery by simulating molecular structures and predicting their interactions, speeding up development cycles.
    • Gaming and Entertainment: AI generated virtual worlds and characters enable richer, more immersive experiences.

    These examples highlight generative AI’s role as a creative collaborator, enhancing human potential across domains.

    Gen AI vs. Machine Learning:

    Charting the Realms of Generative AI

    While generative AI and machine learning (ML) both fall under the broad umbrella of artificial intelligence, they serve different purposes:

    • Machine Learning: ML algorithms focus on learning from data to identify patterns and make predictions. Examples include speech-to-text transcription, spam filtering, or image recognition. Machine learning focuses on predicting outcomes by answering questions such as, “What is most likely to occur next?” by extrapolating from historical data.
    • Generative AI: Going beyond prediction, gen AI synthesizes new content by understanding and reimagining the data it has learned from. Instead of asking “What will happen?” it asks “What can I create?” This distinction marks gen AI as a more dynamic and creative force within AI.

    Put simply, machine learning acts as the analytical engine, while generative AI serves as the creative artist.

    Complementary Roles: Traditional AI and Generative AI Working Together

    Although they differ, traditional AI and generative AI function as complementary technologies rather than competitors. Traditional AI excels in scenarios where accuracy, consistency, and efficiency are paramount—for example, fraud detection in finance, supply chain optimization, or managing customer service automation. Meanwhile, gen AI excels in creative and adaptive domains, including content creation, design, storytelling, and virtual simulations.

    More and more, hybrid AI systems are being developed that blend the dependability of traditional AI with the inventive capabilities of gen AI. These integrated approaches enable smarter, more versatile solutions, blending precision with innovation to solve complex problems and enhance user experiences.

    Understanding generative AI vs traditional AI helps creators choose the right tools when building AI powered art and fantasy AI art experiences.

    Text to picture AI artwork showing how generative AI works in digital image creation.

    Looking Ahead: The Future of Creating AI

    The AI landscape is undergoing rapid transformation as the latest AI tools become more powerful and accessible. The line between traditional rule-based AI and gen AI is becoming increasingly blurred, unlocking unprecedented opportunities across industries—from healthcare and finance to entertainment and education.

    For professionals engaging with AI—whether developers, content creators, or strategists—grasping the nuances between these AI paradigms is essential. Embracing both traditional AI’s strengths and generative AI’s creative potential offers a pathway to the future where machines do more than just follow instructions. They imagine, innovate, and collaborate with us to expand the frontiers of possibility.

    AI image creation example illustrating how generative AI tools generate original visuals.

    Continue Learning AI Image Creation

    How to Edit AI Animation Clips into a Video in CapCut (Easy Beginner Guide 2026)
    Edit and combine short AI animation clips in CapCut to create smoother cinematic sequences, using simple timing, transitions, and effects that transform a few seconds of AI motion into a polished animated scene.

    How to Craft Picture Prompts That Create Powerful AI Images
    Learn how to structure prompts that generate cinematic AI art, detailed characters, and immersive fantasy environments using modern AI image generators.

    How to Animate AI Images: Step-by-Step Beginner Guide
    Discover how creators transform static AI artwork into cinematic animated scenes using modern AI animation tools and image-to-video workflows.

    Best AI Writing Software for Creative Writing & Fiction (2026 Guide)
    Explore how AI writing tools can help spark character ideas and expand your fantasy stories.

    These guides explore the creative side of modern AI tools, from prompt engineering and worldbuilding to transforming static images into cinematic visual stories.

    See the project in action on:

    Frequently Asked Questions About Generative AI

    Q: What’s the difference between Generative AI and Traditional AI when creating AI content?

    A: When creating content, Generative AI produces original images through AI image creation systems and text to image AI models, while traditional AI focuses on analyzing data, predicting outcomes, and optimizing existing systems.

    Q: How does Generative AI work in AI image creation?

    A: Generative AI works in AI image creation by using text to image AI models trained on large datasets of images and descriptions. When a user enters a prompt, the system analyzes patterns it has learned and generates a new text to picture result rather than copying existing artwork. Modern AI image generator tools rely on this process to create original visuals for art, marketing, gaming, and digital storytelling.

    Q: What are the best AI image generator tools for text to image AI?

    A: Popular AI image generator tools for text to image AI include Leonardo AI, Midjourney, and VideoExpress. These platforms power advanced AI image creation by transforming written prompts into detailed text to picture results. If you want ready-to-use prompts for tools like VideoExpress, explore our complete prompt guide here:

    Understanding how generative AI works behind these systems helps creators choose the right tool for fantasy art, marketing visuals, and digital storytelling.

    Discover expert insights, powerful comparisons, and innovative tools designed to help you understand and harness the future of creating AI driven solutions.